Category: DIY

  • 7 Clear Signs You’ve Found a Plumber You Can Actually Trust

    7 Clear Signs You’ve Found a Plumber You Can Actually Trust

    It’s not hard to find a plumber. A quick search brings up dozens. The real challenge is figuring out who’s actually worth letting into your home. Plumbing issues aren’t just about leaks or blocked drains. It’s about peace of mind, safety, and knowing the person handling it is competent and honest.

    If you’ve ever felt unsure about hiring someone for a repair job, you’re not alone. So let’s cut through the fluff and look at the real signs that show you’ve found the right local plumber: someone dependable, experienced, and straightforward.

    1. They show up on time, every time

    This one might seem basic, but it says a lot. If a plumber respects your time enough to show up when they say they will, that’s a strong early indicator of professionalism.

    Things don’t always go perfectly in any trade, but when someone keeps you updated and communicates clearly if they’re running late, that’s even better. It shows they value your schedule and aren’t just trying to squeeze in as many jobs as possible.

    2. They give clear, written quotes without pressure

    Trustworthy local Auckland plumbers don’t dance around pricing. They inspect the problem properly, explain what needs to be done, and give you a written quote that’s easy to understand. No vague language. No last-minute surprises.

    What’s even more important? They give you space to think. You’re never rushed into making a decision. The best plumbers know their work speaks for itself, so they’re not in a hurry to force a sale.

    3. You feel like they’re solving the actual issue

    This one matters more than people realise. It’s not about how fast someone works or how much jargon they throw around. The real test is whether they’re focused on fixing the root cause, not just patching things up temporarily.

    When you ask questions, they answer them clearly. They explain what went wrong, how they’ll fix it, and what you can do to avoid the same problem in future. That kind of transparency builds confidence quickly.

    4. Their work area stays clean and safe

    Plumbing jobs can get messy, but a good plumber respects your space. They take care to protect the area they’re working in, clean up afterwards, and make sure you’re not left with a disaster zone once the job’s done.

    It might seem like a small detail, but it’s a sign of someone who takes pride in their work. If they’re neat and careful in how they treat your home, chances are they’re just as precise with the work you can’t see behind the walls or under the floor.

    5. They’re licensed, insured, and happy to prove it

    This one should never be optional. Any plumber working on your property needs to be fully licensed and insured. Not just for your safety, but theirs too.

    What sets great plumbers apart is how open they are about it. They won’t act offended if you ask. They’ll gladly show proof and explain what those credentials mean. It shows they’re serious about their trade and have nothing to hide.

    Here are some other professional traits you’ll often see in genuinely trustworthy plumbers:

    • Years of experience – They’ve handled a wide range of problems and know how to adapt quickly.
    • Strong communication – They update you clearly at each step without making it overly technical.
    • Professional appearance – They arrive in a clean uniform, with the right equipment, and carry themselves respectfully.
    • Upfront about costs – There are no “extras” slipped in at the end. You know what you’re paying for from the beginning.
    • Respects your decisions – No pressure to accept extra services or upgrades you didn’t ask for.

    6. Past customers recommend them without hesitation

    You might not hear this directly unless someone refers them to you. But often, you’ll find that the best plumbers are the ones who’ve quietly built a strong word-of-mouth reputation.

    It’s not about flashy advertising or big promises. It’s about consistency. When a local plumber has clients who keep coming back — and sending their friends too — that’s a clear sign they’re doing something right.

    If you do end up reading online reviews, look beyond the star ratings. Read how they respond to feedback. Do they stay professional, even with criticism? That can tell you a lot about their character and how they treat people when things don’t go perfectly.

    7. They follow up after the job

    A plumber who checks in after a job is finished stands out. It doesn’t need to be anything formal. A simple call or message to make sure everything’s working properly is enough.

    This shows they care about long-term satisfaction, not just ticking off another job. It’s also a chance for you to ask any follow-up questions, especially if something’s still unclear. That level of attention is rare, but when you find it, it’s worth holding on to.

    How to trust your gut (and your common sense)

    Sometimes, all the technical qualifications in the world don’t mean much if something just feels off. Maybe the plumber was pushy, avoided eye contact, or didn’t seem to listen. Maybe the quote changed halfway through the conversation without a good reason.

    That instinct is worth listening to. Trust is built not only through credentials but through how someone interacts with you from the first phone call.

    Look for the ones who:

    • Take the time to listen before offering solutions
    • Stay calm and patient, even with basic questions
    • Explain things without making you feel stupid
    • Deliver on what they promise, when they promise it

    These traits are what set great tradespeople apart from the rest. And while qualifications and reviews help, it’s these day-to-day behaviours that show you’ve found someone dependable.

    Not Just a Fix, a Go-To Contact

    Finding a plumber you trust isn’t just about solving one emergency. It’s about building a relationship with someone you can call whenever a plumbing issue pops up, whether it’s urgent or not.

    The right local plumber makes life easier. You don’t have to second-guess the quote, worry about whether they’ll show up, or wonder if they did the job properly. You know, because they’ve proven it through every part of the experience.

    That’s not just good service. That’s peace of mind.
  • How to Get Floors That Look Expensive (But Aren’t)

    How to Get Floors That Look Expensive (But Aren’t)

    Some houses just feel more put together. You walk in and everything looks clean, calm, and somehow expensive. It’s not always the furniture or decorations doing the work—it’s the floor. A great floor can make any room look high-end, even if everything else is simple.

    But getting that “wow” look doesn’t mean spending a ton of money. There are smart ways to upgrade floors without breaking the bank. The trick is knowing what to look for and how to find it.

    Why Floors Matter More Than People Think

    Most people don’t think about floors until there’s a problem—like a stain, scratch, or weird creaking sound. But flooring plays a big role in how a space feels. It’s the biggest surface in any room, and it connects everything together.

    The right floor can make a small room feel larger or a dark space feel brighter. It also adds to the style, whether someone wants a cozy vibe or a modern one. The best part? Good-looking floors don’t have to be expensive, even if they appear that way.

    The Power of LVT (Luxury Vinyl Tile)

    One of the easiest ways to get that high-end look without spending too much is by choosing LVT, short for Luxury Vinyl Tile. It sounds fancy, but it’s actually one of the most affordable options out there.

    LVT can look like real wood or stone, but it’s made from durable layers of vinyl. That means it holds up well against scratches, spills, and all the everyday chaos—especially in homes with kids or pets. It’s also easy to clean and soft under your feet, which isn’t always the case with real tile or hardwood.

    If you’re wondering where to start, you could look for options by searching lvt near me to find something local and see what styles are out there. Shopping nearby also helps if you want to see the flooring in person or ask questions before choosing.

    Choosing the Right Look

    A floor doesn’t have to be real hardwood to feel luxurious. LVT comes in so many styles, you can find nearly any look you want. Here are a few popular options that work well in different homes:

    • Light wood tones – These make a space feel open and airy. They’re great for modern or minimal designs.
    • Gray shades – A trendy choice that works with both warm and cool colors in furniture and walls.
    • Rustic or weathered finishes – Perfect for cozy, farmhouse-style homes or rooms with natural light.

    The key is picking something that matches the rest of the space. A floor that looks expensive usually fits well with the room’s overall style.

    It’s Not Just About Looks—It’s About Feel

    A floor might look great in a picture, but it needs to feel right too. Some expensive-looking floors can be cold, hard, or super loud when walked on. LVT solves a lot of those problems. It’s softer and quieter than stone or tile and doesn’t feel icy in the winter.

    That means the floor not only looks good but also makes a home more comfortable to live in. Whether someone is walking barefoot or pets are running around, it holds up well without making every step echo across the house.

    Installation Doesn’t Have to Be Complicated

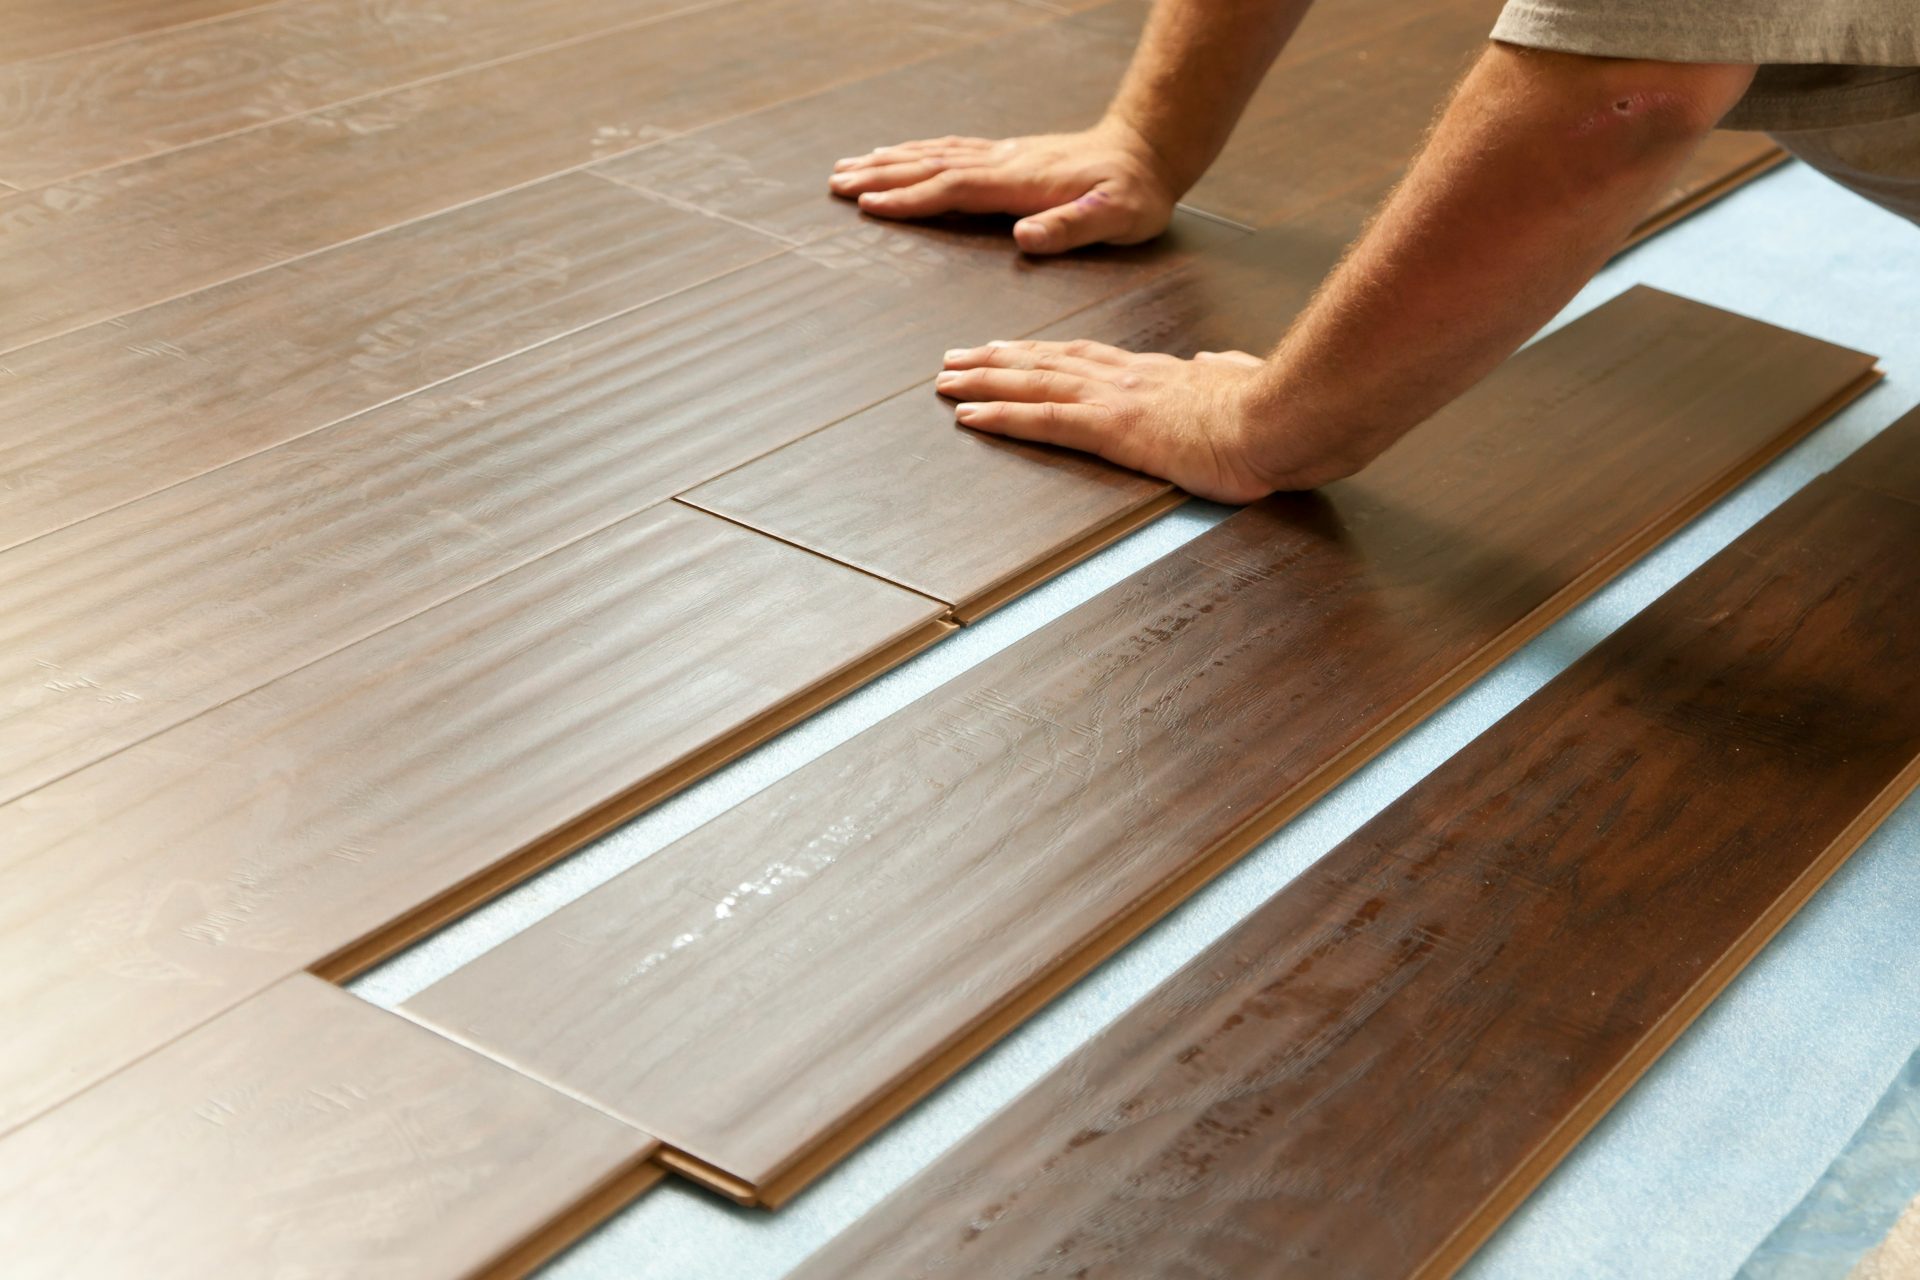
    Another cool thing about LVT is that it’s usually easier to install than traditional flooring. Some versions snap together without glue or nails. That’s a huge bonus if someone wants to save money by doing it themselves or needs the floor ready fast.

    Plus, if a piece gets damaged down the line, it’s not too hard to swap it out. That’s not something that can be said for all floor types.

    Small Changes That Make a Big Impact

    Changing the floor can change how the entire house feels. Even just one room can set a new tone. People often start with the living room, kitchen, or hallway—places where flooring takes a beating and gets seen the most.

    Adding new floors doesn’t mean everything else needs to change. In fact, clean new flooring often makes older furniture or simple decorations look better because the room feels more complete.

    Things to Avoid When Picking Affordable Flooring

    Not all cheap flooring is a good deal. Some may look okay at first, but wear out fast or start peeling at the edges. It’s smart to check reviews, feel samples, and ask about warranties. Paying a little more upfront for quality can save a lot in the long run.

    Also, don’t fall for shiny finishes that scratch easily. A matte or textured look might not seem as flashy at first, but it holds up way better in everyday life.

    Style Without Stress

    One of the best parts about modern flooring options is that they’re designed for real life. You don’t need special cleaners, there’s no need to polish or refinish, and spills don’t turn into disasters. That’s a big win for families, busy schedules, or anyone who just wants their home to look good without extra work.

    With options like LVT, it’s possible to get a floor that looks expensive, feels good, and lasts a long time—all without spending a fortune.

    What to Remember

    Floors can totally change how a room looks and feels. They take up a lot of space and are one of the first things people notice, even if they don’t realize it. Luckily, expensive-looking floors don’t need to cost a lot.

    Choosing something like LVT is a smart way to get the look of real wood or stone without the extra cost, maintenance, or stress. With so many colors and styles out there, it’s easy to find something that works for your home. And with simpler installation and easy care, it’s a choice that keeps paying off every day.

    Thinking about a flooring upgrade? Start by figuring out what kind of vibe you want. Then check out some styles in person. A small change under your feet can make a big difference in how everything around you feels.

  • How to Choose Energy-Efficient Windows That Actually Make a Difference

    How to Choose Energy-Efficient Windows That Actually Make a Difference

    Think your windows are just for the view? Think again. The wrong windows can quietly drain your energy bills month after month, all while making your home less comfortable. But here’s the good news: with the right knowledge, you can pick energy-efficient windows that do more than just look good. They can seriously impact how your home feels and how much you spend keeping it warm or cool.

    If you’re ready to make a smarter choice, here’s what to pay attention to when choosing energy-efficient windows for your home.

    Start with the Basics: What Makes a Window Energy Efficient?

    It’s not just about double glazing or fancy materials. Energy-efficient non-impact window solutions are built to keep your indoor temperature steady, no matter what the weather’s doing outside. That means less heat escaping in the winter and less heat getting in during the summer.

    Here’s what goes into that:

    • Glass type – Look for windows with low-emissivity (Low-E) coatings. These invisible layers reflect heat while letting in natural light.
    • Multiple panes – Double-pane is the standard, but triple-pane can add even more insulation, especially in colder climates.
    • Gas fills – Between those panes? It’s not just air. In high-efficiency models, it’s often argon or krypton gas, which insulates better.
    • Frame material – Wood, vinyl, fiberglass, and composite frames all perform differently when it comes to insulation and durability.
    • Proper installation – Even the best window won’t work as it should if it’s poorly installed. Airtight sealing is key.

    Focus on Performance Ratings That Matter

    All those features sound great, but how do you compare one window to another without getting lost in technical jargon? Simple. Check the performance ratings. They’ll tell you how well a window handles heat transfer, sunlight, and airflow.

    These are the main numbers to watch:

    U-Factor
    This measures how well a window keeps heat inside. Lower is better. If you live somewhere cold, this is the number you want to pay the most attention to.

    Solar Heat Gain Coefficient (SHGC)
    This tells you how much heat from the sun passes through the window. In warmer regions, look for a lower SHGC to help keep your home cool. In colder areas, a slightly higher number can actually help warm things up in winter.

    Visible Transmittance (VT)
    How much natural light comes in? A higher VT means more daylight, which can reduce the need for artificial lighting.

    Air Leakage
    Even small gaps around the window can lead to drafts. The lower the air leakage rating, the tighter the seal.

    Climate Matters – Choose Windows That Fit Your Region

    A window that works brilliantly in Arizona won’t perform the same in Minnesota. Where you live plays a big role in which features should be your priority.

    In cold climates, insulation is everything. Look for windows with a low U-Factor and multiple panes. Gas-filled units and tight seals are non-negotiable.

    In hot climates, you’ll want to block heat. That means a lower SHGC and possibly tinted glass that filters out infrared light while still letting in brightness.

    And, then there are regions where hurricanes and storms are a regular part of life. In those areas, durability matters most. You will need impact-resistant windows that can stand up to strong winds and flying debris.

    To explore your options, check out platforms similar to stormprowindow-door.com, where you can find a variety of energy-efficient window models designed for different climate conditions.

    Not All Frame Materials Are Created Equal

    It’s easy to overlook the frame when choosing windows, but it plays a big role in energy efficiency and long-term durability.

    Vinyl
    Affordable and low-maintenance, vinyl offers decent insulation but can warp over time if not well-made.

    Wood
    Great insulator and visually appealing, but it requires more upkeep to prevent rot or warping.

    Fiberglass
    Very durable and stable. It handles temperature swings well and offers solid thermal performance.

    Composite
    Made from a mix of materials, composites tend to be both efficient and low-maintenance. A good middle ground if you’re after performance without too much upkeep.

    Choose a material that fits both your climate and your willingness to maintain it.

    Installation Isn’t Optional – It’s Essential

    The most energy-efficient window won’t perform well if it’s not installed correctly. Poor sealing can lead to drafts, moisture problems, and energy loss.

    Look for experienced installers who specialize in energy-efficient windows. Ask about how they handle sealing, flashing, and insulation around the frame. It’s also worth checking whether your home needs any adjustments to fit the new windows properly – sometimes older homes require a bit of extra prep work to get the fit right.

    And yes, professional installation is worth the cost. A sloppy DIY job could undo all the benefits of a high-performance window.

    Consider the Long-Term Payoff

    Yes, energy-efficient windows cost more upfront than standard ones. But that extra cost often pays for itself, not just in savings, but in how your home feels.

    Here’s where you see the return:

    • Lower heating and cooling bills, month after month
    • More consistent indoor temperatures (no more chilly drafts or hot spots)
    • Less strain on your HVAC system, which can extend its life
    • A quieter home, thanks to the insulating layers that also block sound
    • Higher resale value, as more buyers now care about energy performance

    It’s not just about the windows. It’s about comfort, savings, and long-term value.

    Make the Upgrade Count

    Energy-efficient windows are one of those rare home upgrades that touch nearly every part of daily life – comfort, cost, aesthetics, and even noise levels. Choosing the right ones isn’t about chasing trends. It’s about being informed and making decisions based on your home, your climate, and your needs.

    If you’re ready to upgrade, take your time to compare, ask the right questions, and make sure the installation is just as solid as the product itself. A little planning now leads to a home that feels better every day and a utility bill that doesn’t sting quite so much.

  • 6 Signs Your House Is Trying to Tell You Something

    6 Signs Your House Is Trying to Tell You Something

    Most of the time, your house feels quiet. Steady. Familiar. But every now and then, it tries to get your attention-only, it doesn’t do it with words. It does it with sounds, smells, shifts, and small things that don’t feel quite right.

    The key is to notice these signs early, before they grow into costly problems. So, if something in your home feels “off,” here are six clues it might be trying to tell you something important.

    1. The Roof Is Giving You Hints

    When was the last time you really looked at your roof or tried to consult a roofing expert? Not just a glance, but a proper look? For most people, it’s out of sight, out of mind-until there’s a leak, and suddenly it’s the only thing on your mind.

    Roofs don’t fail overnight. They wear down gradually, sending small signals along the way. You might spot shingles that are curling or slipping out of place. Maybe a patch of dark streaks that weren’t there before. Or worse, you see stains on your ceiling inside the house-too late, the water’s already made its way in.

    If your roof is over 20 years old, it’s worth checking even if everything seems fine. Those quiet signs are your house whispering, not yelling-yet. You can always reach out to a roofing contractor, like https://atriumroofing.com/, to make sure everything’s holding up the way it should.

    2. Cracks That Weren’t There Last Year

    Every home settles over time, especially if it’s older. A few hairline cracks in the wall? Usually nothing to stress about. But if you’re noticing new cracks that weren’t there a few months ago-or ones that are clearly getting wider-it might be time to pay closer attention.

    Watch the spots around door frames and windows. That’s often where the first signs show up if there’s a deeper structural shift happening. You might see diagonal cracks, or even that familiar “stair-step” pattern in brickwork outside.

    The house isn’t falling apart, but it might be asking for a structural check-in before a small shift becomes a bigger problem.

    3. Your Doors and Windows Are Acting…Strange

    You know your house. You know how the doors usually swing, how the windows usually glide. So, when something changes-it sticks, it scrapes, it suddenly doesn’t close right-you feel it.

    These kinds of changes aren’t always caused by humidity or wear and tear. Often, they’re tied to the frame around them moving, even slightly. That could mean the foundation is shifting. Or the wood is warping due to hidden moisture.

    It’s subtle, and easy to brush off. But it’s also one of the most common signs that your home’s bones are shifting under the surface.

    4. A Smell You Can’t Quite Place

    There’s nothing like walking into your home and catching a whiff of something that shouldn’t be there. It’s faint, but persistent-musty, damp, or just plain “off.”

    Often, it’s the first clue that there’s a moisture issue somewhere. Maybe it’s behind a wall where a pipe has a slow leak. Or it’s coming from a crawlspace or attic with poor ventilation. You won’t always see water damage right away, but your nose usually notices before your eyes do.

    If the smell sticks around, don’t mask it-track it down. It could save you a huge headache later.

    5. Your Floors Feel Different

    Walking through your house should feel solid and familiar. But if you suddenly notice a slight bounce, or one room feels like it’s sloping a little more than before, pay attention.

    This kind of subtle shift in the floor can point to a few different things-moisture damage below the surface, rotting subfloor materials, or movement in the joists that hold everything up. It doesn’t always mean disaster, but it’s never something to ignore.

    The sooner you find the cause, the easier it’ll be to fix without ripping everything apart.

    6. The Paint Just Won’t Stay Put

    Ever repaint a wall, only to see it start peeling again a few months later? And it’s always in the same spot?

    That’s usually a sign that moisture is lurking beneath the surface. Paint doesn’t just bubble or flake for no reason. If it’s happening in a bathroom, kitchen, or near windows, it could be due to condensation or poor ventilation. In other spots, it might mean there’s a leak behind the wall that hasn’t shown its face yet.

    Instead of slapping on another coat, it’s worth figuring out why the paint keeps giving up. The real problem might be just out of sight.

    Your House Knows Before You Do

    You don’t need to be an expert to know when something feels different in your home. A sag here, a squeak there, a spot that smells a little off-it all adds up to a bigger picture.

    The good news? These signs usually show up early. And catching them early means avoiding more expensive repairs later.

    So next time your home sends a signal, take a moment to listen. It’s not being fussy. It’s trying to help.

  • How to Design a Kids’ Room: Creative Tips for a Fun and Functional Space

    How to Design a Kids’ Room: Creative Tips for a Fun and Functional Space

    Designing a kids’ room requires careful consideration of both functionality and creativity. A well-designed space can inspire play, relaxation, and learning. To create a successful kids’ room, it’s essential to incorporate their interests, ensure safety, and allow for growth and flexibility.

    Colors, furniture choices, and decorative elements play a significant role in setting the tone. Utilizing a mix of vibrant hues and practical storage solutions can help keep the space organized while maintaining a playful atmosphere. Designing with the child’s personality in mind fosters a sense of ownership and pride in their environment.

    Safety should always be a top priority when designing a kids’ room. Selecting non-toxic materials, securing furniture to walls, and ensuring that all items within reach are safe will create a worry-free haven for exploration and creativity. Balancing fun and functionality is key to crafting a space that supports the child’s development and happiness.

    Planning the Ideal Kids’ Room

    Creating a functional and inviting kids’ room involves understanding the child’s needs and preferences, planning the layout effectively, and prioritizing safety and well-being. These elements contribute to a supportive environment tailored to a child’s development.

    Assessing Needs and Preferences

    Identifying the individual needs and likes of the child is crucial. Begin by engaging the child in discussions about their interests, favorite colors, and themes. This collaboration fosters a personal connection to the space.

    Consider the child’s age and developmental stage. Younger children may require more play space, while older children might need areas for study or hobbies. A list of preferences can guide design choices and ensure the room reflects the child’s personality.

    Key questions to ask include:

    • What are their favorite activities?
    • Do they have favorite characters or themes?
    • How do they prefer their space to be organized?

    Space Planning and Layout

    Effective space planning maximizes both function and aesthetics. Measure the room dimensions and create a scaled floor plan. Consider furniture placement to allow for easy movement and access.

    Furniture arrangement tips:

    • Position the bed in a corner to create a cozy nook.
    • Keep play areas clear to encourage creativity.
    • Use vertical space with shelves for storage.

    Incorporate flexible furniture, such as a convertible bed or a foldable desk, to adapt as the child grows. Additionally, ensure that common areas remain clutter-free to promote a calming atmosphere.

    Integrating Safety and Well-Being Considerations

    Safety is paramount in a child’s room. Choose furniture with rounded edges to minimize injury risks. Secure heavy items, like bookcases, to the walls to prevent tipping. Additionally, exposed electrical outlets and poorly lit areas are common safety concerns in a child’s room, as they increase the risk of shocks and trips. However, issues like these can be resolved by having an electrician sanford nc (or elsewhere) assess the room, install outlet covers, and add child-friendly lighting to ensure a safe environment.

    Additional safety measures include:

    • Use non-toxic paints and materials.
    • Install window locks or guards.
    • Ensure proper lighting to reduce accidents.

    Moreover, consider the psychological aspects of design. Incorporate soothing colors and personal touches to enhance emotional well-being. Creating a cozy, safe environment promotes relaxation and play, supporting the child’s overall development.

    Choosing the Right Style and Furniture

    Selecting the right style and furniture is crucial in creating a functional and aesthetically pleasing kids’ room. A well-chosen design can inspire creativity and comfort while meeting practical needs. Focus on specific themes, functional furniture options, and the incorporation of natural materials.

    Exploring Styles and Themes

    When designing a kids’ room, it is essential to explore various styles and themes that reflect the child’s personality and interests. Popular themes include:

    • Adventure: Incorporate elements like maps, animals, and exploration motifs.
    • Fantasy: Use colors and decor that evoke a sense of wonder, such as fairy tales or outer space.
    • Nature: Bring the outdoors inside with colors reminiscent of forests, oceans, or mountains.

    Parents should also consider coordinating colors across furniture and accessories to create a cohesive look. Soft pastels or bright primary colors can enhance the overall atmosphere of the space. Depending on the age of the child, styles can evolve from playful to more sophisticated as they grow.

    Selecting Functional Furniture

    Functionality is key when choosing furniture for a kids’ room. Pieces should not only serve a purpose but also be durable and safe. Some important factors to consider include:

    • Size: Ensure furniture is appropriate for the child’s age and height to promote ease of use.
    • Multi-functionality: Look for beds with storage drawers or desks that can convert into play areas.
    • Safety: Choose rounded edges and non-toxic finishes to guarantee safety during play.

    Examples of essential furniture pieces include a sturdy bed, a versatile desk, and ample storage solutions such as shelves and bins. Creating a balance between function and style fosters an organized and enjoyable environment.

    Incorporating Natural Materials

    Natural materials contribute to a healthier and more inviting atmosphere in a child’s room. They are generally more sustainable and can be seamlessly integrated into various styles. Key materials to consider are:

    • Wood: Opt for solid wood furniture for durability and a timeless appeal. It can add warmth and character to the space.
    • Cotton and Linen: Use natural fabrics for bedding and curtains to enhance comfort and breathability.
    • Bamboo: This eco-friendly option is lightweight and strong, making it ideal for shelving or decor.

    Incorporating these materials not only improves air quality but also sets the foundation for a space that fosters harmony and creativity.

    Maximizing Storage and Organization

    Effective storage and organization are crucial in a kids’ room. By combining open and closed storage solutions and segmenting the space into zones for different activities, the room can remain tidy and functional.

    Open and Closed Storage Solutions

    Open storage provides easy access to frequently used items, making it ideal for kids. Shelves, baskets, and hooks are excellent options. They help children learn to put things away, promoting responsibility and independence.

    Closed storage options, such as cabinets or bins, hide clutter and protect belongings. Utilizing multi-functional furniture, like ottomans with storage or beds with drawers, serves dual purposes. It ensures every item has its designated place.

    Combining both types creates a balanced environment. For instance, a low bookshelf can display toys while a cupboard stores less attractive items. This approach keeps the room organized and visually appealing.

    Creating Zones for Play, Study, and Rest

    Dividing the room into distinct areas fosters a functional and enjoyable environment. The play zone should feature soft rugs and accessible toys, allowing children to engage in creative activities without cluttering other spaces.

    A study area must have a dedicated desk and proper lighting. This encourages focus and productivity. Including adequate storage for books and school supplies is essential for maintaining order.

    The rest zone should be cozy and calming. A comfortable bed or sleeping nook, with storage nearby for pajamas and bedtime stories, promotes good sleep habits. By clearly defining these zones, parents can create a harmonious room that meets all their child’s needs.

  • How to Choose the Right Dumpster for a Single-Family Home Cleanup

    Planning a big home cleanup? Whether you’re decluttering the attic, tackling a renovation project, or simply clearing out years of accumulated stuff, renting a dumpster can make your life so much easier. But how do you figure out which one is right for your needs? Don’t worry—this guide has you covered.

    Why a Dumpster is Worth It

    Let’s face it: dealing with piles of waste is overwhelming. Sure, you could make dozens of trips to the local dump or leave an unsightly stack of bags at the curb, but why not simplify things? A dumpster gives you a single, convenient place to toss all your unwanted items. No mess, no stress.

    Think about how much time you’ll save when you don’t have to cram everything into the back of your car or argue with your local waste service about what they’ll actually take. Plus, renting a dumpster from Waste Removal USA helps you stay organized during your cleanup—everything goes straight into the bin, keeping your space tidy while you work.

    During this process, you may find items that you are not ready to throw away but do not have room for in your home. This is common when sorting through family keepsakes, seasonal gear, or extra furniture. Instead of letting these things crowd your living space or forcing yourself to discard them, keeping them in a secure off-site unit is a practical option. Working with a trusted storage company allows you to keep your belongings safe while you finish your home project. This gives you the time to decide what to do with your things without any added pressure.

    Size Matters: Picking the Perfect Dumpster

    Dumpsters come in a variety of sizes, and choosing the right one is crucial. You don’t want to rent something too small and end up needing a second bin—or overpay for one that’s much larger than you’ll actually fill. So, how do you decide?

    Start by estimating the volume of waste you’ll be disposing of. For most single-family home projects, a 10-yard or 20-yard residential dumpster rental will do the trick.

    • 10-yard dumpsters – Great for small projects like clearing out a garage or basement. These hold roughly three truckloads of waste.
    • 20-yard dumpsters – Perfect for larger jobs, such as a home remodel or major decluttering. These can handle about six truckloads.
    • 30-yard dumpsters – Typically used for more intensive projects like roofing or demolition. While they’re spacious, you probably won’t need one for an average home cleanup.

    Still unsure? It’s better to slightly overestimate your needs rather than underestimating. Running out of space mid-cleanup is not fun.

    What Can (and Can’t) Go in Your Dumpster

    Before you start tossing items into your rented dumpster, it’s important to know what’s allowed. Most services have clear guidelines, so double-check their list to avoid extra fees.

    Here’s a quick breakdown:

    • Allowed items – Furniture, appliances (without refrigerants), yard waste, construction debris, household junk, and general clutter.
    • Prohibited items – Hazardous waste like paint, chemicals, batteries, tires, and electronics. These require special disposal methods, so contact your local waste facility for guidance.

    Keep in mind that overloading a dumpster—both in weight and volume—can lead to additional charges. Be mindful of the weight limits, especially if you’re dealing with heavy materials like concrete or tile.

    How Long Do You Need It?

    Another factor to consider is how long you’ll need the dumpster. Are you tackling a weekend project, or do you need it for a week or more? Many roll off waste container rental companies offer flexible timelines, but it’s a good idea to plan ahead.

    If you’re clearing out a single room or small area, a couple of days might be enough. For larger-scale cleanups or renovations, give yourself at least a week to ensure you’re not rushed. The last thing you want is to feel pressured to finish before you’re ready.

    Placement: Where Should It Go?

    Deciding where to place the dumpster might seem like an afterthought, but it’s actually a key step. Ideally, you want it as close to the work area as possible, so you’re not hauling debris across your yard or driveway. Most people opt for their driveway because it’s flat, accessible, and keeps the dumpster out of the way of street traffic. Just make sure there’s enough clearance for delivery and pickup. If your driveway is too small, placing it on the street might be an option.

    Lay down some plywood under the dumpster to protect your driveway from scratches or damage. In any case, if the damage has already been done or the damage was already incurred, getting it fixed would be the best bet. In such cases, looking up Cincinnati concrete repair or similar services in your area can help you with driveway restoration, crack repair and resurfacing, and more.

    Comparing Costs

    Dumpster rentals aren’t one-size-fits-all when it comes to pricing. The cost will vary based on the size you choose, how long you need it, and where you’re located. That said, here are a few tips to keep costs reasonable:

    1. Shop around – Get quotes from multiple providers and compare not just the price but also what’s included (weight limits, fees, etc.).
    2. Avoid overages – Stick to the guidelines for weight and prohibited items to prevent surprise charges.
    3. Pick the right size – Renting a smaller dumpster and needing a second one can cost more than just renting a slightly larger bin upfront.

    Being clear about your project needs when booking will also help ensure you’re not paying for more than you actually need.

    Getting the Most Out of Your Rental

    To maximize your rental, pack the dumpster efficiently. Start with flat, heavy items on the bottom, like wood or metal, and work your way up with lighter items. Breaking down bulky items, like furniture or boxes, can save space and help you fit more in.

    And if you have any leftover space at the end? Take the opportunity to throw in other items you’ve been meaning to get rid of. It’s the perfect chance for a full household refresh!

    Ready to Tackle Your Cleanup?

    Choosing the right dumpster might feel like just another task on your to-do list, but it’s one of the most important decisions for a smooth and stress-free cleanup. With the right size, proper placement, and a little planning, you’ll breeze through your project in no time.

    Remember, a dumpster isn’t just a rental—it’s your cleanup partner. So, take a moment to plan, and you’ll thank yourself when the job is done. Happy cleaning!

  • How Weather Affects Pool Maintenance and What You Can Do About It

    How Weather Affects Pool Maintenance and What You Can Do About It

    Owning a pool is a joy—there’s no denying the appeal of having a spot to cool off in summer or entertain friends and family. But let’s face it, maintaining your pool can feel like a full-time job, especially when the weather seems to throw new challenges your way every season. Rain, heat, wind, or even colder temperatures can all impact how your pool behaves and what kind of care it needs.

    The good news? With the right strategies and a little help from the pros, you can keep your pool in top shape year-round. So, let’s break down how different weather conditions affect your pool and what you can do to stay on top of things.


    Summer Heat: Friend or Foe for Pools?

    A hot summer day might be ideal for a pool party, but the heat brings its own set of maintenance challenges. Warmer weather speeds up evaporation, which means your pool can lose water faster than you’d expect. Combine that with increased swimmer activity, and you’ll be topping up the water more often.

    Another concern? Algae love the heat. When temperatures rise, algae growth can spike, turning your sparkling pool into a green nightmare if left unchecked.

    Here’s what you can do:

    • Regularly test your water – Heat can mess with your pool’s chemical balance, so make water testing a weekly priority.
    • Stay on top of chlorine levels – Higher temperatures can cause chlorine to break down faster. Ensure you’re replenishing it as needed to keep the water safe.
    • Use a pool cover – When your pool isn’t in use, a cover can help reduce evaporation and keep debris out.

    If keeping up with chemical levels feels like a science experiment, consider professional pool maintenance Perth. Experts can handle testing and balancing for you, saving time and ensuring your pool stays healthy.


    Rainy Days: More Than Just Splashing Around

    Rain might seem harmless—it’s just water, right? Not exactly. Rainwater can dilute your pool’s chemical balance, throwing off pH levels and reducing the effectiveness of chlorine. Plus, heavy rain can wash debris and contaminants into your pool, making it murky and uninviting.

    To manage the effects of rain:

    • Clean your pool after a storm – Skim off leaves, branches, or any debris to avoid clogging your filters.
    • Check chemical levels – After heavy rain, test your water and adjust pH and chlorine levels as needed.
    • Inspect your pool’s drainage system – Make sure it’s functioning properly to prevent flooding around the pool area.

    If storms are frequent in your area, regular maintenance by a professional can save you the hassle of constant adjustments. They’ll ensure your pool stays balanced and crystal-clear no matter how often it rains. Meanwhile, for people who are thinking of buying a pool but are concerned about the quality of construction, materials, and installed features, they can benefit from entrusting the project to reliable professionals like Pool Stop Online, who can build custom pools with precision and attention to detail.


    Windy Weather: Debris, Debris, and More Debris

    Windy days can turn your pool into a magnet for everything blowing around—leaves, dirt, even small branches. Beyond making your pool look messy, all that debris can clog your filters and create the perfect breeding ground for algae and bacteria.

    Here’s how to tackle the aftermath of a windy day:

    • Invest in a quality pool net – Skimming debris off the surface should be your first step.
    • Clean your filters regularly – A clogged filter makes it harder to keep your pool clean and can strain your pump system.
    • Trim nearby trees and plants – Reducing overhanging branches can minimise the amount of debris falling into your pool.

    If windy conditions are a regular issue, a professional maintenance service can take care of routine cleaning and ensure your equipment stays in good shape.


    Winter Challenges: Pools Aren’t Just a Summer Thing

    Even if you’re not using your pool during winter, it still needs attention. Cooler weather slows down evaporation, but it can also cause your pool’s chemical levels to shift. And in areas where temperatures dip close to freezing, pipes and equipment could be at risk of damage.

    To keep your pool protected during winter:

    • Lower the water level – This can help prevent freezing damage if temperatures drop dramatically.
    • Add winterising chemicals – These can help keep algae and bacteria at bay while your pool is out of use.
    • Cover your pool – A good-quality pool cover prevents debris from accumulating and reduces the need for cleaning.

    Winter maintenance is one area where professional help is invaluable. A maintenance team can prepare your pool for the off-season, so you’re not dealing with unpleasant surprises when the weather warms up. Winter can bring unexpected challenges, from fluctuating chemical levels to the risk of frozen pipes. Finding reliable local experts is crucial to protect your investment, which is why many homeowners search for “Pool Maintenance Near Me” to connect with professionals nearby. These teams can provide tailored care, ensuring your pool stays safe, clean, and ready for use when warmer months return.


    Why Professional Pool Maintenance is Worth It

    You might be wondering, do you really need professional maintenance? The answer often comes down to convenience and peace of mind. Maintaining your pool’s chemical balance, cleaning filters, and managing unexpected issues (like algae outbreaks after a heatwave) takes time, effort, and expertise.

    A professional maintenance team can handle all of this for you. They’ll:

    • Perform regular testing and balancing – Ensuring your pool is always safe and pleasant to use.
    • Handle deep cleaning – Including the removal of stubborn algae or calcium buildup.
    • Inspect your equipment – Catching potential issues early can save you from costly repairs down the line.
    • Prepare your pool for seasonal changes – Whether it’s summer or winter, they’ll make sure your pool is ready.

    While you can handle some pool care yourself, having a professional on call means fewer headaches and more time to enjoy your pool.


    Ready to Keep Your Pool in Top Shape?

    Weather will always be a factor in pool maintenance, but it doesn’t have to feel overwhelming. By understanding how different conditions affect your pool and staying proactive, you can avoid common issues and keep things running smoothly. And if juggling chemicals and cleaning sounds like more than you want to deal with, professional maintenance is always an excellent option.

    For saltwater pool owners, salt water pool maintenance is especially important. While these pools require less frequent chlorine addition, they still need regular monitoring of pH, salt levels, and equipment such as salt chlorine generators. Seasonal and weather changes can affect these factors just like in traditional pools, so having experts maintain your system ensures balanced water, efficient equipment operation, and a safe, enjoyable pool year-round.

    After all, your pool should be a place to relax, not stress. So why not let the experts handle the hard work while you sit back and enjoy the benefits?

    Whether it’s summer heat, winter chills, or a surprise thunderstorm, your pool will be ready for whatever the weather throws at it.

  • Opulent Oasis: Creating a Spa-Like Experience at Home with Luxurious Bathroom Upgrades and Features

    Opulent Oasis: Creating a Spa-Like Experience at Home with Luxurious Bathroom Upgrades and Features

    In today’s fast-paced world, finding moments of relaxation and tranquility is essential for our well-being. One of the most effective ways to achieve this is by transforming your bathroom into a luxurious spa-like retreat. With the right upgrades and features, you can turn your daily routine into a rejuvenating experience that rejuvenates both body and mind. Let’s explore some ideas to create your own opulent oasis at home with a luxurious new bathroom.


    1. Setting the Scene: Design and Ambiance

    Design Elements

    • Neutral Colors – Opt for calming hues like soft whites, muted grays, or gentle blues to create a serene atmosphere.
    • Natural Materials – Incorporate natural elements such as stone, wood, and bamboo to add warmth and authenticity to the space.
    • Ample Lighting – Install both overhead and task lighting to ensure adequate illumination while creating ambiance with dimmable options.
    • Minimalist Décor – Keep clutter to a minimum and select sleek, minimalist accessories for a clean and sophisticated look.

    Ambiance

    • Aromatherapy – Introduce essential oil diffusers or scented candles with relaxing fragrances like lavender or eucalyptus to promote calmness.
    • Soft Music – Set the mood with soothing sounds or nature-inspired playlists to enhance relaxation during bath time or grooming routines.

    2. Indulgent Bathing Experiences

    Luxurious Bathtub

    Freestanding Tub – Consider investing in a freestanding bathtub for a touch of elegance and comfort.

    Hydrotherapy Features – Explore options with hydrotherapy jets or air massage systems for a spa-like soaking experience.

    Overflow Fillers – Install sleek overflow fillers for a visually striking and functional addition to your bathtub.

    High-End Shower Features

    Rainfall Showerhead – Upgrade to a luxurious rainfall showerhead to mimic the sensation of standing under a gentle downpour.

    Body Jets – Install body jets for a targeted massage experience, allowing you to unwind and relieve tension after a long day.

    Steam Shower – Transform your shower into a steam room with a built-in steam generator, offering therapeutic benefits for both body and mind.

    3. Pampering Amenities

    Heated Flooring

    Radiant Heating – Install radiant floor heating beneath tiles or stone for luxurious warmth underfoot, especially during colder months.

    Thermostat Control – Invest in a programmable thermostat to regulate temperature settings and maximize comfort.

    Plush Towels and Robes

    High-Quality Fabrics – Treat yourself to plush towels and robes made from premium materials like Egyptian cotton or bamboo for a luxurious feel.

    Warmers – Install towel warmers to add a touch of indulgence to your post-shower routine, keeping towels toasty and inviting.

    4. Functional Elegance: Smart and Stylish Fixtures

    Smart Technology Integration

    Smart Mirrors – Explore mirrors with integrated lighting, defogging capabilities, and built-in speakers for added convenience and functionality.

    Touchless Faucets – Opt for touchless faucets to promote hygiene and streamline daily tasks with hands-free operation.

    Voice-Activated Controls – Embrace the convenience of voice-activated controls for adjusting lighting, temperature, and music without lifting a finger.

    Statement Pieces

    Designer Faucets – Elevate your bathroom’s aesthetic with designer faucets in sleek finishes like brushed nickel or matte black for a touch of modern elegance.

    Sculptural Basins – Make a statement with sculptural basin sinks crafted from premium materials such as marble or tempered glass, adding visual interest to your vanity area.

    5. Tranquil Retreat: Creating a Relaxation Nook

    Cozy Seating

    Vanity Stool or Bench – Include a comfortable seating option near your vanity or bathtub for moments of relaxation and pampering.

    Greenery and Natural Elements

    Indoor Plants – Bring the outdoors in with low-maintenance indoor plants like ferns, peace lilies, or snake plants to purify the air and enhance the ambiance.

    Natural Light – Maximize natural light with strategically placed windows or skylights, connecting your bathroom to the beauty of the surrounding environment.

    6. Sustainability and Eco-Friendly Practices

    Water-Saving Fixtures

    Low-Flow Toilets and Showerheads – Opt for water-saving fixtures to conserve water without sacrificing performance or luxury.

    Eco-Friendly Materials

    Recycled Materials – Choose eco-friendly materials such as recycled glass tiles or reclaimed wood for a sustainable and stylish bathroom design.

    Energy-Efficient Lighting

    LED Lighting – Switch to energy-efficient LED lighting fixtures to reduce energy consumption and lower utility bills while creating a well-lit and inviting space.

    Conclusion

    By incorporating these luxurious upgrades and features into your bathroom design, you can transform it into a personal sanctuary that rivals the most opulent spas. From indulgent bathing experiences to pampering amenities and smart, stylish fixtures, every detail contributes to creating an oasis of relaxation and rejuvenation within the comfort of your own home. Take the time to curate a space that not only meets your functional needs but also nourishes your soul and promotes well-being on a daily basis. With the right elements in place, your bathroom can become the ultimate retreat where you can escape the stresses of the outside world and immerse yourself in pure luxury and tranquility.

  • Opulent Oasis: Creating a Spa-Like Experience at Home with Luxurious Bathroom Upgrades and Features

    Opulent Oasis: Creating a Spa-Like Experience at Home with Luxurious Bathroom Upgrades and Features

    In today’s fast-paced world, finding moments of relaxation and tranquility is essential for our well-being. One of the most effective ways to achieve this is by transforming your bathroom into a luxurious spa-like retreat. With the right upgrades and features, you can turn your daily routine into a rejuvenating experience that rejuvenates both body and mind. Let’s explore some ideas to create your own opulent oasis at home with a luxurious new bathroom.


    1. Setting the Scene: Design and Ambiance

    Design Elements

    • Neutral Colors – Opt for calming hues like soft whites, muted grays, or gentle blues to create a serene atmosphere.
    • Natural Materials – Incorporate natural elements such as stone, wood, and bamboo to add warmth and authenticity to the space.
    • Ample Lighting – Install both overhead and task lighting to ensure adequate illumination while creating ambiance with dimmable options.
    • Minimalist Décor – Keep clutter to a minimum and select sleek, minimalist accessories for a clean and sophisticated look.

    Ambiance

    • Aromatherapy – Introduce essential oil diffusers or scented candles with relaxing fragrances like lavender or eucalyptus to promote calmness.
    • Soft Music – Set the mood with soothing sounds or nature-inspired playlists to enhance relaxation during bath time or grooming routines.

    2. Indulgent Bathing Experiences

    Luxurious Bathtub

    Freestanding Tub – Consider investing in a freestanding bathtub for a touch of elegance and comfort.

    Hydrotherapy Features – Explore options with hydrotherapy jets or air massage systems for a spa-like soaking experience.

    Overflow Fillers – Install sleek overflow fillers for a visually striking and functional addition to your bathtub.

    High-End Shower Features

    Rainfall Showerhead – Upgrade to a luxurious rainfall showerhead to mimic the sensation of standing under a gentle downpour.

    Body Jets – Install body jets for a targeted massage experience, allowing you to unwind and relieve tension after a long day.

    Steam Shower – Transform your shower into a steam room with a built-in steam generator, offering therapeutic benefits for both body and mind.

    3. Pampering Amenities

    Heated Flooring

    Radiant Heating – Install radiant floor heating beneath tiles or stone for luxurious warmth underfoot, especially during colder months.

    Thermostat Control – Invest in a programmable thermostat to regulate temperature settings and maximize comfort.

    Plush Towels and Robes

    High-Quality Fabrics – Treat yourself to plush towels and robes made from premium materials like Egyptian cotton or bamboo for a luxurious feel.

    Warmers – Install towel warmers to add a touch of indulgence to your post-shower routine, keeping towels toasty and inviting.

    4. Functional Elegance: Smart and Stylish Fixtures

    Smart Technology Integration

    Smart Mirrors – Explore mirrors with integrated lighting, defogging capabilities, and built-in speakers for added convenience and functionality.

    Touchless Faucets – Opt for touchless faucets to promote hygiene and streamline daily tasks with hands-free operation.

    Voice-Activated Controls – Embrace the convenience of voice-activated controls for adjusting lighting, temperature, and music without lifting a finger.

    Statement Pieces

    Designer Faucets – Elevate your bathroom’s aesthetic with designer faucets in sleek finishes like brushed nickel or matte black for a touch of modern elegance.

    Sculptural Basins – Make a statement with sculptural basin sinks crafted from premium materials such as marble or tempered glass, adding visual interest to your vanity area.

    5. Tranquil Retreat: Creating a Relaxation Nook

    Cozy Seating

    Vanity Stool or Bench – Include a comfortable seating option near your vanity or bathtub for moments of relaxation and pampering.

    Greenery and Natural Elements

    Indoor Plants – Bring the outdoors in with low-maintenance indoor plants like ferns, peace lilies, or snake plants to purify the air and enhance the ambiance.

    Natural Light – Maximize natural light with strategically placed windows or skylights, connecting your bathroom to the beauty of the surrounding environment.

    6. Sustainability and Eco-Friendly Practices

    Water-Saving Fixtures

    Low-Flow Toilets and Showerheads – Opt for water-saving fixtures to conserve water without sacrificing performance or luxury.

    Eco-Friendly Materials

    Recycled Materials – Choose eco-friendly materials such as recycled glass tiles or reclaimed wood for a sustainable and stylish bathroom design.

    Energy-Efficient Lighting

    LED Lighting – Switch to energy-efficient LED lighting fixtures to reduce energy consumption and lower utility bills while creating a well-lit and inviting space.

    Conclusion

    By incorporating these luxurious upgrades and features into your bathroom design, you can transform it into a personal sanctuary that rivals the most opulent spas. From indulgent bathing experiences to pampering amenities and smart, stylish fixtures, every detail contributes to creating an oasis of relaxation and rejuvenation within the comfort of your own home. Take the time to curate a space that not only meets your functional needs but also nourishes your soul and promotes well-being on a daily basis. With the right elements in place, your bathroom can become the ultimate retreat where you can escape the stresses of the outside world and immerse yourself in pure luxury and tranquility.

  • DIY Gifts for Graduation

    DIY Gifts for Graduation

    Graduation is a time to celebrate! Your son or daughter has just worked so hard that you can now give them something to help them remember their accomplishments. It is a special moment, and it’s one you want to give a memento to commemorate the occasion. Maybe you’re looking for a way to say well done, or perhaps you want to wish your friend all the best as they start the next chapter in their life.

    Unique Graduation Gifts for Students

    Customized Phone Case

    Many people customize their phones with a phone case, but for something that many people hold and carry all day long, it makes sense to have a phone case with some meaning. Luckily, it’s possible to personalize phone cases with a photo, so choose a good one from a time during their studies and gift it to them so that they can remember every time they look at their phone.

    Memory Box

    box filled with pictures and mementos from their university days can be a wonderful graduation gift. This heartfelt collection serves as a tangible reminder of all the beautiful memories and encapsulates the journey they have shared with their friends. You can include handwritten notes wishing them the best for their future endeavors, along with gifts that resonate with their interests and passions. For example, you might consider gifting them music albums from their favorite artists or K-pop bands from platforms like kplaceshop.com. These items allow them to celebrate their fandom and express their identity.

    DIY Photo Book

    A DIY photo book makes the perfect graduation gift. They’ll remember your thoughtful gesture when they look back on the photo memories. It’s the perfect keepsake to commemorate their graduation and remind them of all the beautiful experiences they had during their time at uni.

    Canvas Prints

    Canvas prints are uniquely their own because they’re collages of two or more photographs and can be sized to fit any wall. Choose from any number of DIY canvas prints for graduate students to make a thoughtful gift that will be appreciated for years to come.

    Engraved Jewelry

    DIY jewelry is a booming industry, as DIY gifts are now more popular than ever, especially for milestone events and celebrations. DIY jewelry can be engraved with names, dates, messages, memorable quotes, or even family photos, while stones can be chosen with a special meaning. Apart from these, you can also Explore Tirafina’s Elegant Designs and similar others for fine jewelery pieces that combine modern sophistication with sentimental value.

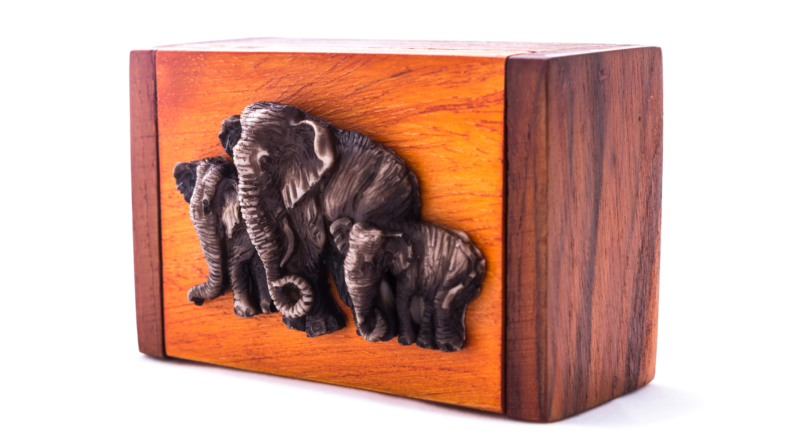
    Keepsake Box

    These gifts are always well received. When giving graduation gifts, the key is to choose a gift that the receiver will enjoy but, more importantly, will use and appreciate. A keepsake box can be treasured by the recipient and are sure to be used for many years.

    DIY Wine Glasses

    Graduation is a time to celebrate the accomplishment, and what better way to commemorate graduation than with a few drinks! Custom wine glasses are also a lovely gift for anyone who appreciates fine glassware or anyone who enjoys a drink with their mates.

    Customized Hoodies

    DIY hoodies are a great choice because they’re durable and fashionable. If you plan well, you can get matching hoodies for the recipient and all of their friends, so they’ll always remember being together when they wear them.

    Photo Pillows

    DIY photo pillows are a trendy and inexpensive gift. Plus, they’re great to snuggle up against when times get tough. Graduates may be missing their friends or struggling to adapt to the outside world, so a photo pillow is something that will give them comfort whenever they need it.

    Stainless Steel Water Bottle

    DIY stainless steel water bottles help to keep hydrated while on the go, whilst also keeping the recipient motivated every time they see the DIY photo or inscription. Customized water bottles can be great accessories for exercise, travel, and everyday use.

    Fleece Blanket

    DIY gifts for graduate students don’t always have to be expensive or hard to find. You can make a fleece blanket yourself if you have the time, either with their favorite colors or, if you’re feeling confident, with a favorite pattern. You can even buy blankets with photos printed on them, making them ideal if you have a great graduation picture you want to print.

    There are many unique DIY gifts that students will appreciate. These gifts show how much thought you put into buying them, and show how proud you are of them for their achievements.