
Author: Nuru

  • How to Build a Coffee Table: Step-by-Step Plans, Materials, and Finishing Tips

    How to Build a Coffee Table: Step-by-Step Plans, Materials, and Finishing Tips

    You will learn how to build a coffee table with simple materials, clear measurements, and basic tools so you can make a sturdy, attractive centerpiece for your living space. Follow straightforward plans, cut and assemble the pieces, and finish the surface to create a custom coffee table that fits your style and skills.

    They will walk through tools, materials, joinery options, and step-by-step assembly techniques so the project stays manageable, whether tackling a first build or refining a design. Expect practical tips on measuring, cutting, fastening, and finishing that keep mistakes small and results professional.

    Step-by-Step Guide to Building a Coffee Table

    This guide outlines decisions about design, material selection, cutting and joinery, assembly steps, sanding and finishing, and personalization options to help a builder make a functional, attractive coffee table that fits their space and skill level.

    Choosing the Right Coffee Table Design

    They begin by matching table dimensions to the sofa height and room scale: common coffee table height is 16–18 inches, length about two-thirds the sofa width, and depth 18–24 inches for rectangular tables. Decide between styles—modern low-profile, chunky farmhouse, rustic pallet, industrial metal-and-wood, or a round/minimalist design—and pick functionality like storage, lift-top, or hidden compartments.

    Consult specific plans (free printable plans, DIY coffee table plans, or coffee table plans for hairpin leg or balustrade designs). For existing materials, choose a pallet coffee table or door coffee table plan. For a multiuse piece, select lift-top or storage coffee table designs; for outdoor use, choose treated wood or a patio coffee table plan with pavers or weatherproofing.

    Selecting Materials and Tools

    They choose wood species for look and stability: pine or poplar for budget DIY coffee table projects, hardwoods (oak, walnut, maple) for durable wooden coffee table builds, and reclaimed wood for rustic or pallet coffee table ideas. Select metal legs for an industrial coffee table or hairpin leg designs. For outdoor patio coffee table projects, use cedar, redwood, or pressure-treated lumber.

    Essential tools: table saw or circular saw for ripping boards, miter saw for crosscuts, orbital sander for finishing, drill/driver for joinery, clamps for glue-ups, pocket-hole jig for hidden fasteners, router for edge profiles, and measuring tools. Add hardware: wood glue, screws, pocket-hole plugs, lag bolts for legs, and finish supplies like stain and polyurethane.

    Cutting and Preparing Wood Components

    They lay out a cut list from plans (free coffee table plans or custom coffee table design) and cross-check board widths and grain orientation before cutting. Use a table saw or circular saw with a straightedge for ripping; use a miter saw for precise end cuts and repeatable lengths. For a round coffee table, cut a template and use a jigsaw or router with a circle-cutting jig.

    Joint edges and tabletop boards: straighten edges on the jointer or use a table saw fence method; plane or sand surfaces to uniform thickness. Pre-drill pocket holes or dowel holes according to the coffee table tutorial or DIY coffee table plans. Label pieces and do a dry fit to confirm layout for features like hidden storage or lift-top hardware.

    Assembling the Table Frame and Top

    They assemble the frame first: build aprons and rails, attach legs (hairpin, turned, or metal) with bolts or pocket holes, and ensure corners are square with clamps and a carpenter’s square. For chunky farmhouse coffee table frames, use mortise-and-tenon or reinforced lap joints; for crate storage coffee tables, assemble box units and secure them under the top.

    Join tabletop boards with glue and biscuits or pocket screws; clamp and wait the recommended glue cure time. If building a coffee table with storage or a lift-top, install drawer slides, hinges, or gas-lift hardware after the top is flattened and trimmed. For industrial coffee table plans, bolt the metal frame to the wooden top with countersunk bolts and washers.

    Sanding and Surface Preparation

    They begin sanding with 80–100 grit to remove mill marks, progress to 120–150 grit to level joints, and finish with 180–220 grit for a smooth surface prior to staining or oil. Use an orbital sander for tabletops and hand-sand in corners and tight spots to avoid swirl marks. Vacuum and tack cloth between grit changes to remove dust that can mar the finish.

    Fill gaps or nail holes with wood filler that matches the species, let it dry, then sand flush. For reclaimed or pallet coffee table surfaces, remove contaminants and pull nails before sanding. Test stain on a scrap or inconspicuous area to check color and absorption differences between end grain and face grain.

    Finishing Techniques and Protection

    They choose a finish based on desired sheen and durability: penetrating oils (tung, Danish) enhance grain; oil and wax give a low-luster, repairable surface; polyurethane (water- or oil-based) offers a hard, protective coating for high-use coffee tables. Apply stain first if coloring is desired; wipe off excess and allow proper drying time before clear coats.

    For polyurethane, apply thin, even coats with a foam brush or lint-free cloth, sand lightly with 320–400 grit between coats, and apply 2–4 coats depending on traffic. For outdoor patio coffee tables, use spar urethane or marine-grade finishes for UV and moisture resistance. For an aged coffee table look, distress edges gently, then seal to preserve the patina.

    Customization and Personalization Ideas

    They personalize using leg styles (hairpin legs for mid-century, chunky turned legs for farmhouse), inlays, painted drawer faces, or metal accents for an industrial coffee table. Add functionality: build hidden storage compartments, a lift-top mechanism for a work surface, or integrate crate storage and sliding panels for easy access.

    Decorative options include epoxy-filled knots for a rustic or terrarium coffee table effect, glass inset for a terrarium or display cavity, or stenciled patterns and contrasting stain for a two-tone modern coffee table. Offer plan variations: convert simple DIY coffee table plans into a coffee table with hidden storage, or adapt a square coffee table to a round tabletop using a new template; include hardware choices and measurements in the build notes.

  • The Complete Guide to Finding and Fixing Hidden Household Water Leaks

    The Complete Guide to Finding and Fixing Hidden Household Water Leaks

    The Complete Guide to Finding and Fixing Hidden Household Water Leaks

    A full manual to locate and repair unknown home water seepage

    Almost all pipeline seepages will not loudly announce their presence with a puddle. More often, they’ll reveal themselves as a marginally higher water statement, a musty scent you cannot determine, or a warm area on the tile floor. By that point, you’ll probably have had water leaking for up to a few weeks if not months.

    The following manual guides you through a diagnostic sequence that most plumbers will use: first, attempt what is free, then what is not expensive, and you can only bring in more pricey tools once you have a seepage and the common causes are not the issue.

    Start with the water meter, not a wrench

    Before you make a run to the store or grab a sledgehammer, it is worth using the free diagnostic tool you already have. Every home is equipped with a water meter, and most have a little triangular or star-shaped low-flow indicator. This spins to indicate movement even when only tiny amounts of water are trickling into the system.

    Here’s the test: make sure that every fixture and appliance in the house is turned off. No washing machine filling, ice maker cycling, or toilets refilling. Read the meter and note where the low-flow indicator sits. Then wait 30 minutes and read it again. If that little pointer has moved at all, water is moving through your system when it shouldn’t be, and nothing in your home should be using it. That’s a leak, end of story, even if you can’t see or hear the evidence of it.

    This test costs nothing and takes about half an hour. It’s also the only way to know for sure whether you have a real problem, or just an old house that likes to talk back to you.

    The toilet is almost always the first suspect

    If the water meter test verifies a leak, check the toilets before doing anything else. A worn flapper, the rubber seal at the bottom of the tank, is far and away the number one culprit of hidden water loss in a home. When it fails to seat properly, water leaks from the tank into the bowl virtually non-stop, often without making enough noise for anyone to easily hear, and it can waste thousands of gallons before anyone is the wiser.

    Testing for this is easy. Drop a dye tablet or some food coloring into the tank and then wait ten minutes without flushing. If you see color in the bowl, the flapper is your problem. It’s generally a $10 part and fifteen minutes with a wrench, not a plumbing call.

    Test every toilet in the house this way, not just the one you’ve targeted as the culprit. Flappers degrade so gradually that an old toilet in a three-bathroom home may have two leaking flappers with no one the wiser.

    Check your water pressure while you’re at it

    You can easily attach a pressure gauge to an outdoor hose bib. The pressure for residential systems should be between 40 and 80 psi. If your pressure reading is higher than that, a failing or incorrectly adjusted pressure regulator is forcing every joint, valve, and appliance supply line in your house to do more work than it should.

    This is important because high pressure generally won’t blow something wide open. It will, however, force every drop of water in your system to try and find a way out of your pipes, which leads to constant small seepage at fittings and connections. This looks like nothing until it has been dripping into a wall cavity for several months. A pressure gauge is a $15 item that will tell you something about your plumbing a visual inspection never will.

    Reading the signs of a slab leak

    Pipe leaks under a slab foundation are known as slab leaks. Slab leaks occur when the water or drain lines that run below a concrete foundation develop a hole. They are often difficult to detect and can go unnoticed for a long time. Common signs of a slab leak include warm water bubbling up from the floor, unexplained cracks in your flooring, or an unexplained increase in your water bill.

    Unfortunately, these symptoms will not be fixed by a DIY repair. You cannot turn off a slab leak using a household valve, and you should not dig through your concrete foundation on a hunch. Detecting a slab leak typically requires either using a tracer gas or acoustic detection equipment. And, if you are off by even an inch in your guess of where the leak is occurring, you could end up tearing up a lot of flooring for nothing.

    Pinhole leaks and what your water chemistry is doing to your pipes

    It’s rare for copper pipe to fail catastrophically. Instead, it develops pinhole leaks – small corrosion holes that seep water rather than spray. And the cause is often chemical rather than structural. Water with a pH of less than 7.0, or water with a high chlorine content, leaches from the copper over years. The pipe looks healthy from the outside until it’s not.

    Usually, there’s a stain before there’s a drip. Soft drywall, a brown ring on the ceiling, or a patch of wall that seems slightly moist to the touch can appear several weeks before a pinhole has opened up enough to produce a steady stream of water. Mold and mildew are often the first red flag that a homeowner sniffs, coming long before any evident structural damage. If you smell mustiness in one room and can’t track down the source, it’s time to call a plumber, not a maid.

    Where DIY ends and professional detection starts

    You know a leak is there but you can’t see it and you can’t reach it – so what do you do? If you’re like most people, you get out the Sawzall. But before you start attacking your walls, flooring, or concrete structures, you should probably know that leak location companies now have access to very high-tech tools that can find even the smallest amount of water loss absolutely anywhere. These tools can spell the difference between a $300 repair and a $3,000 renovation.

    The tiniest water line leak can be detected through electronic amplification equipment using ground microphones and listening sticks. Acoustic leak detection equipment employs sensitive ground microphones and sensors that can readily detect the signature hissing or whooshing sounds of water under pressure as it escapes from a tiny crack, loose-fitting, or poorly sealed joint. These sounds might not carry to the surface or through a concrete slab or even be audible in a wall cavity or ceiling. The acoustic equipment magnifies the sounds that are naturally present at the leak site, including those that are sometimes inaudible to the human ear, making it easy to pinpoint the location of the break.

    Thermal imaging cameras sense temperature differences on surfaces and show exactly where a pipe runs under a concrete floor or a sink cabinet. It also can show the easiest path for water escaping from a broken pipe, and even small amounts of water will show up clearly. If used early, a thermal imaging camera will often register a wet path from the source all the way to the present location. Removing the wet drywall, wood, or another material will prevent mold growth and water damage in the future. This is very important as a small leak could go undetected for long periods behind a bathroom cabinet, kitchen sink, or wall.

    A service like Simply Leak Detection uses exactly this kind of equipment to pinpoint the exact break before any demolition happens, which means the repair crew that comes in after knows precisely where to cut instead of opening up an entire wall on a hunch.

    Why "just a small leak" costs more than it looks like

    It may be tempting to ignore a leak that is not causing an immediate flood. However, even just one drip per second can waste about 3,000 gallons of water in a year. This is roughly equivalent to the amount of water used in 180 showers. And that’s from a leak that you probably consider to be "barely noticeable."

    The bigger picture suggests that this is not an isolated issue either. In fact, the EPA estimates that leaks in U.S. homes waste 1 trillion gallons of water every year nationwide. This translates to about 10,000 gallons of water wasted per household annually. It is estimated that 10% of U.S. homes lose 90 gallons or more per day to leaks that go undetected. This is not a case of one bad pipe in a few unfortunate homes. This is a regular, widespread issue that many homeowners are paying for without realizing it.

    Smart monitors tell you something’s wrong. They don’t tell you where.

    Devices such as Flume, Moen Flo, and Phyn have gained popularity. They’re great at one thing in particular: notifying you that there’s a leak somewhere in your system by detecting abnormal water flow rates. That’s valuable, and we’d recommend one to any homeowner looking to gain better visibility into their water usage.

    But they have a limitation that doesn’t get talked about enough. Smart monitors can only tell you that water is moving when it shouldn’t be. They can’t tell you where that water is coming from. You still have to find the leak yourself, and by the time the app sends the alert, the seepage has often already been running long enough to soak insulation or start warping subfloor.

    Treat smart monitors as an early warning system, not a solution. They shorten the time between "leak starts" and "leak discovered." They don’t shorten the time between "leak discovered" and "leak located and fixed."

    The insurance problem nobody mentions until it’s too late

    Here’s a detail that surprises many homeowners. Most standard policies draw a distinction between sudden, accidental damage, and gradual seepage. A burst pipe that floods your kitchen overnight is normally covered. A slow pinhole leak that’s been dripping behind a wall for four months, causing rot and mold, is often considered to be gradual damage and is entirely excluded.

    This turns "I’ll get to it eventually" into a potentially very expensive gamble. A leak you notice and get fixed early is a minor repair bill. The exact same leak, left to run until it causes visible structural damage, can become a "not covered" claim, leaving the entire cost in your lap.

    Prevention that actually moves the needle

    There are a few cheap habits that will prevent most of the common hidden leak scenarios before they happen.

    For example: swap out rubber washing machine supply hoses for braided stainless steel ones. Rubber washing machine hoses are a known failure point and a leading cause of sudden, high-volume flooding. The upgrade costs less than $30.

    Check your water pressure once a year with that same $15 gauge. Swap toilet flappers every couple of years as routine maintenance rather than waiting for them to fail. Knowing where your main shut-off valve is, and making sure everyone else in the house does too, is a good general practice – in a real pipe burst, the time it takes you to find that valve is often the difference between a $200 repair and a $5,000 claim.

    None of this requires special skill. It requires doing it before you need to, not after.

    The bottom line

    A hidden pipe leak rarely stays hidden forever, but by the time it reveals itself through stained ceilings or warped floors, you’re looking at a repair bill several times larger than if you’d caught it early. The meter test, the dye tablet, and the pressure gauge cost virtually nothing and take less than an hour to apply together. Run them first, trust what they tell you, and bring in equipment built for finding what you can’t see once you’ve confirmed there’s something to find.

  • Why Easy-to-Clean Materials are the Secret to a Low-Maintenance Kitchen

    Why Easy-to-Clean Materials are the Secret to a Low-Maintenance Kitchen

    Why Easy-to-Clean Materials are the Secret to a Low-Maintenance Kitchen

    Grease spills, sauce splatters, or an errant pot of soup are inevitable on any work surface. Whether cleaning up takes five seconds or ten minutes often depends on one factor: Is the surface nonporous or porous? Get that part right, and everything else is easy.

    Why porous surfaces make more work for you

    Natural wood, unglazed stone, and flat paint all have one problem in common. They contain minuscule gaps and exposed pores where fluid, oil, and grease can enter and not remain on the surface. Once this occurs, simply wiping these surfaces will spread the mess around. Coated walls behind the stove can be cited as a classic instance, they may appear fine for some time, but they will begin to display dull spots and stains that refuse to come off despite your best efforts with the cleaning spray.

    However, glazed ceramic tiles function differently. The glaze is a glassy coating baked onto the top, acting as a seal that prevents anything from penetrating the clay beneath. As a result, grease, tomato sauce, or steam will just stay on top, waiting for you to clean it off. Nothing seeps in, nothing remains attached to the material, and nothing remains for bacteria to proliferate on, because they are unable to feed on it. Most people underestimate how important this latter detail is – studies by microbiologist Charles Gerba at the University of Arizona have shown that the average kitchen can have up to 200 times the number of bacteria found in a bathroom. This makes non-porous surfaces in food preparation areas a real health concern rather than a nice-to-have.

    Comparing finishes: gloss, matte, and everything between

    The finish is as important as the tile material. The glossier the glaze, the smoother the tile. That means there are fewer nooks and crannies on the tile for dirt and grease to cling to, so it doesn’t just clean more easily when you come to it, but ages better in between washes. Matte and textured finishes look more interesting but carry a hidden cost in time and elbow grease over the years. However, gloss does make water spots and fingerprints stand out more, so if multiple people are cooking and the wall’s likely to get brushed against a lot, you might decide that a matte finish is more practical after all. It’s worth weighing that up against the extra scrubbing gloss saves you elsewhere.

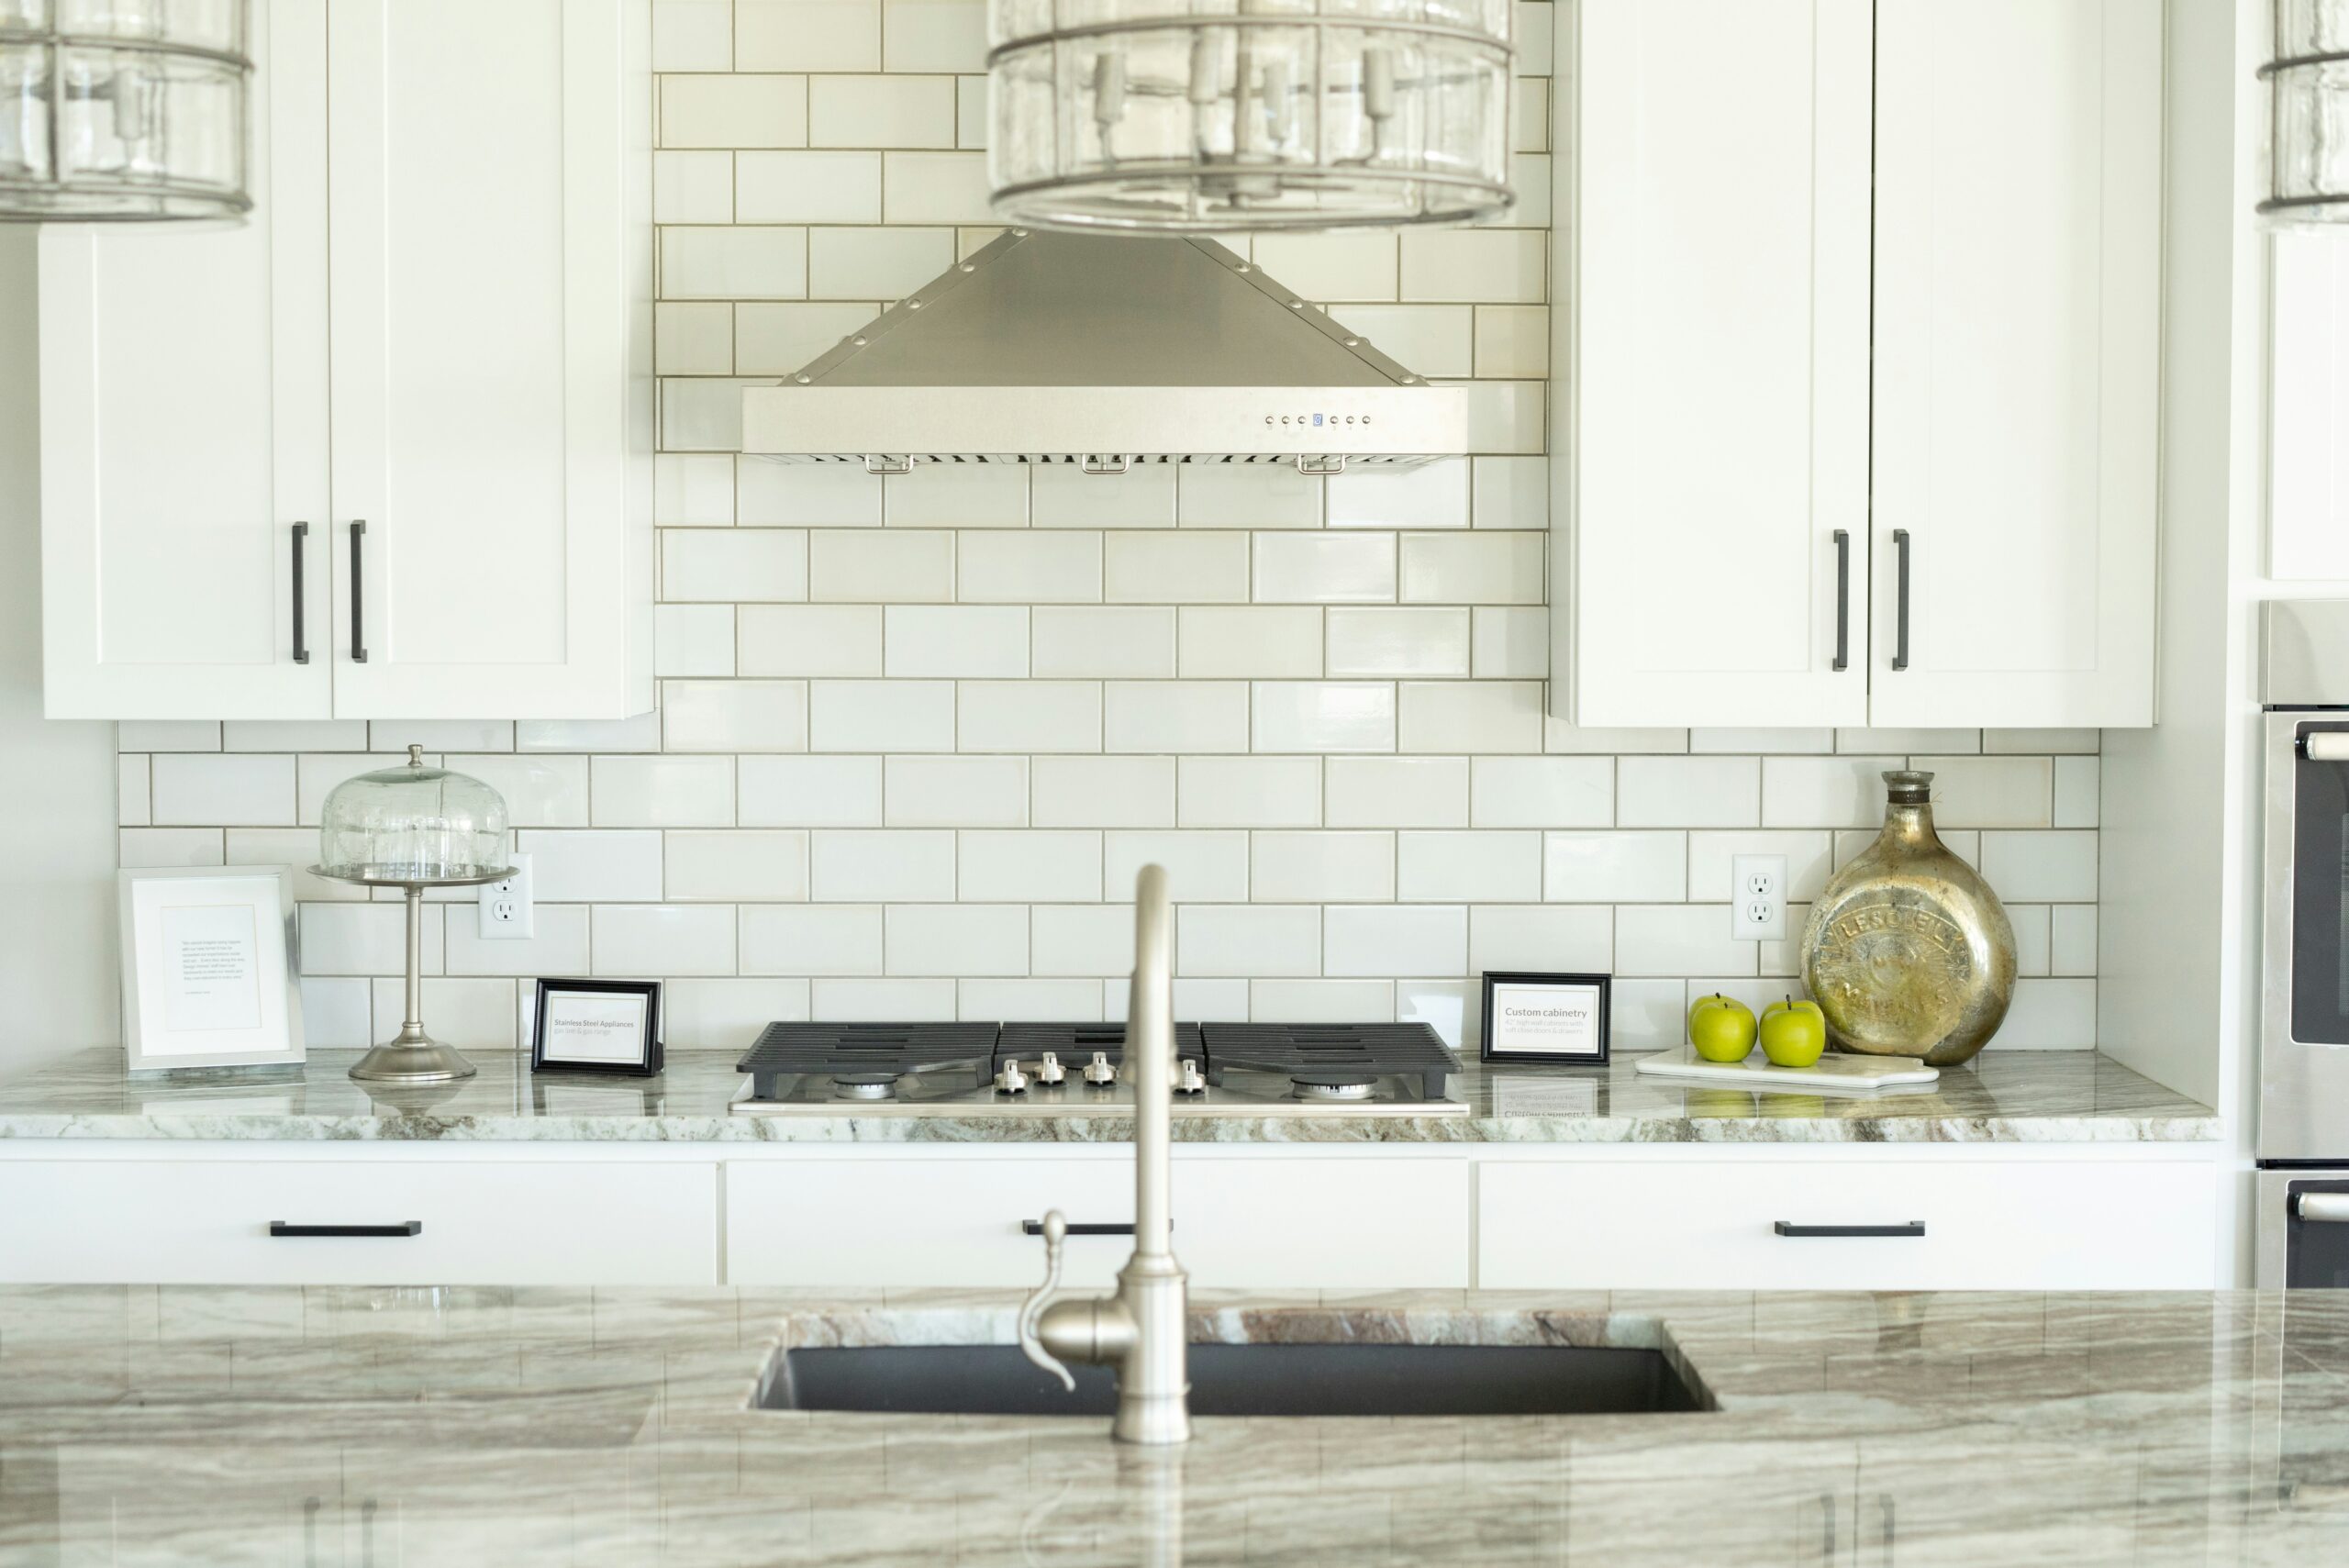
    If you’re pragmatic about it, glazed ceramic wall tiles have a lot going for it. They need the least cleaning, stay stain-free and low-bacteria for longer, and the grouting is a minor weak point in an otherwise waterproof surface. Paint stains and needs redecorating. Wallpaper can’t handle steam or grease at all. Natural stone looks premium but is porous and needs regular sealing. Glass splashbacks wipe clean easily but show every smear and fingerprint, and they cost more to install and replace if cracked. For most kitchens, glazed ceramic hits the best balance of low upkeep, durability, and price.

    The splashback is where it counts most

    If you had to choose just one wall to invest in when renovating your kitchen, make it the one behind the hob. This is the area that’s hit with oil spatter, steam, and the odd overflowing pan, day in, day out. Unfortunately, paint and wallpaper don’t cope well with that level of wear and tear. Eventually, paint will lose its freshness and need repainting while wallpaper will start to peel, bubble, or stain irreparably. A tiled splashback simply needs a quick wipe after cooking and it’ll look as good as new in five years. It’s your best bet for the biggest, easiest-to-maintain impact.

    Don’t let grout undo the good work

    What many homeowners don’t realize is that no matter how stain-resistant the tile you choose, the wall will look dirty if the grout lines get stained. Cement grout is porous, and it absorbs grease, making it easy to discolour it over time, especially on walls in the splash zone. The way to avoid this is to do one of two things. First, select larger format tiles with fewer grout lines to deal with in the first place. The second is to use epoxy grout, which is non-porous and virtually maintenance-free once it’s installed. This keeps the walls looking clean over the long term, and not just the first year or so.

    The same logic applies to bathroom wall tiles

    It may seem like splashbacks and bathroom walls have nothing in common, but they are essentially the same problem, just that one is for oil and food splatter while the other is for humidity, condensation, and soap scum. The underlying problem is the porosity of the surface. Porous surfaces such as paint, wallpaper, or unglazed tiles will trap moisture and residues like a sponge, while glazed ceramic acts as a non-porous barrier that resists such infiltration. Glazed ceramic handles bathroom dampness just as well as it handles a kitchen splashback, which is why it’s the sensible default for both rooms rather than something you choose room by room.

    A wall you don’t have to think about

    The best surfaces are those that don’t require you to remember maintenance. After sealing the grout and glazing the tile, you simply need to clean it regularly which only takes a few seconds rather than spending your whole weekend on it. And that’s the real payoff of selecting the right material from the start.

  • How to Find a Lawyer: A Confident, Step‑by‑Step Guide to Choosing the Right Attorney

    How to Find a Lawyer: A Confident, Step‑by‑Step Guide to Choosing the Right Attorney

    You need a lawyer who fits the issue, budget, and timeline — not the first name that appears online. Start by defining the legal problem, then narrow choices to attorneys who specialize in that area and have verifiable experience and clear fees.

    They can vet options with referrals, bar association directories, online reviews, and a quick phone consult to gauge communication and strategy. The rest of this article walks through practical steps to compare credentials, check conflicts, and prepare for an effective initial meeting so you can hire with confidence.

    How to Find a Lawyer

    This section explains how to decide whether to hire legal help, pick the right practice area, use directories and searches, and match a lawyer to a specific legal issue. It focuses on practical steps for finding and retaining an attorney for family, business, property, criminal, or civil matters.

    Determining If You Need a Lawyer

    They should assess the stakes: money at risk, criminal exposure, or long-term rights like custody or property inheritance. Simple questions help—Will missing a deadline harm my case? Could I face jail time? Is the other side represented by counsel?

    If consequences are significant, hiring a lawyer usually improves outcomes. For low-risk matters, limited-scope assistance (document review, one-time consultation) can be a cost-effective option. Track deadlines, gather documents, and estimate legal costs before deciding.

    Look for signals that require counsel: complex evidence, contested probate, business contract disputes, bankruptcy filings, or a formal complaint in state court. If the matter involves an unfamiliar procedure or appeals, retain an attorney experienced in that practice area.

    Identifying the Right Legal Practice Area

    Match the problem to a practice area—family law for divorce and custody, probate for wills and inheritance matters, bankruptcy for debt relief, personal injury for accidents, criminal defense for charges, and business law for contracts and entity formation. Choosing the correct practice area narrows the search and avoids wasted consultations.

    Review attorney profiles for specific experience: years in practice, number of similar cases, and published case summaries or client outcomes. Confirm licensure in the relevant state court system and look for certifications or bar association specialization where available.

    For mixed issues, like divorce with property/business valuation or criminal charges with immigration consequences, seek attorneys who handle the intersection or assemble a team. Ask about typical strategies, likely timelines, and fee structures during an initial phone call.

    Using Attorney Directories and Online Searches

    Start with reputable attorney directories: state bar referral services, Avvo, Martindale-Hubbell, and local legal aid sites. Use filters for practice area, location, language, and client ratings. Cross-check directory listings against the state bar’s public attorney records for discipline history.

    Search engines help find law firms that publish case summaries, client guides, and fee information. Read 3–5 lawyer profiles and at least two client reviews before reaching out. Use keywords like “probate attorney near me,” “bankruptcy lawyer [city],” or “personal injury lawyer free consult” to refine results.

    Prepare a short comparison sheet: name, practice area, years of experience, initial fee, retainer amount, payment plans, and availability. Contact 2–3 candidates for free or low-cost consultations and compare answers about strategy and expected outcomes.

    Choosing a Lawyer for Specific Legal Issues

    For family matters and divorce, prioritize negotiation and custody experience; request sample settlement approaches and mediation results. For probate and inheritance, look for experience with estate administration, will contests, and tax implications. Ask about probate court familiarity in the county involved.

    For criminal defense, require trial experience and local court contacts; confirm the lawyer’s track record with charges like DUI, drug offenses, or felony cases. For business law, find attorneys who draft contracts, advise on entity selection, and handle disputes or commercial litigation. For bankruptcy, check chapter experience (7, 11, 13) and creditor negotiation success.

    For personal injury, prioritize trial experience, contingency-fee structure, and past settlement amounts. Always ask for references and case summaries relevant to the issue. Clarify billing, communication methods, and the scope of representation before signing a retainer agreement.

  • How to Design a Multi-Functional Kitchen Space That Stays Bright All Day

    How to Design a Multi-Functional Kitchen Space That Stays Bright All Day

    How to Design a Multi-Functional Kitchen Space That Stays Bright All Day

    The kitchen is perhaps the most multi-functional room in our homes. From cooking and dining to working, reading, and homework, it needs to accommodate a variety of activities and adapt to different times of the day. This multitasking demands careful lighting decisions.

    Start with zones, not fixtures

    Before considering a single light fitting or rooflight position, get your head around the space. A multi-functional kitchen operates because different activities take place in different areas, even if those areas meld into each other. The kitchen work triangle – sink, stove, refrigerator – is still a good basic planning tool, but in an open-plan layout, you have to apply that idea to a dining zone, a workspace or homework corner, and a social area too.

    Prep zone, dining zone, work/homework zone, and social zone. Four zones, four different lighting needs. The prep area wants sharp, shadow-free work light. The dining zone wants something warmer, more ambient and diffused. Roughly 50 lux, according to the lighting geeks. A desk or work corner needs similarly shadow-free and brightly focused area light, without the added horror of computer-screen glare thrown in.

    Paper and pencil planning and the question: where will the arrival of natural light be coming from, at what angle, and at what time of day – and spanning panes become a logical decision rather than a stab in the dark. A good grid plan will curtail all unhelpful architect’s solutions to "Here? Six feet up in the middle?" Or "How about a fun stripe across here?" It will also curb the later intervention of the Electrician’s Clever Sconce in the exact center of the useful shelf.

    Why vertical windows aren’t enough for deep extensions

    Many kitchen extensions are built without considering daylight. Instead, it’s a decision made after – it felt like a bright space so let’s not worry too much about it, then curtains or blinds are installed because, in fact, it isn’t that light at all. Or the decision is made based on the suggested configuration instead of the options available to you – you could have a pitched roof or a flat one, you assume a flat roof would be cheaper. Or the sales pitch is about getting as much glass up as possible.

    I’ve said it before and I’ll say it again, the glass is not the thing. The daylight is the thing. Let that be your guiding principle and you’ll cope with much less than you assume. Really. Skimp on the daylight and it’ll impact on your long-term well-being in a way that a less generous surface material or awkwardly positioned pendant never will. If you can’t keep the kitchen clean and carefully organized because you can’t see what you’re doing, it’s life-changing. If you have to put the lights on in the middle of the day, it’s life-changing.

    Choosing the right glazing – thermal performance and light quality

    Skylights are not all the same. How the glass is made can mean the difference between a kitchen that’s comfortable to stand in come July, and one that’s positively unbearable. The same unit that lets in welcome winter sunlight can also be a heat sink when the rain stops and the mercury rises. Two numbers – the U-value and the Solar Heat Gain Coefficient (SHGC) – determine how well a kitchen skylight copes with heat transfer in and out, and how much solar heat pours through the glass. Further, the frame can be thermally ‘broken’ or unbroken, meaning that it forms a continuous sequence of conductive material right around the edge – the weak point in any window in terms of energy performance.

    Trying to make it as simple as possible to match what’s available with what you need; 1.2 W/m²K is around the sort of maximum you want for a U-value. Below 1.0 is good; below 0.8 is high performance. Fabulous SHGC performance is around 0.25. Put simply, the right skylight specialist – like Addlite – can offer the latest generation of thermally broken frames in options like fully bespoke made-to-measure flat rooflights. If you take the care and don’t scrimp on the more expensive but demonstrably better quality option, your skylights will read their environmental surroundings like the most responsive vent in an HVAC system. All of which will make them extraordinarily cheap to run in terms of energy and virtually maintenance free.

    Roof lanterns vs. flat rooflights – picking the right profile

    The shape of the rooflight actually affects the light, as flat rooflights deliver light downwards in a direct column, while roof lanterns capture light from multiple sides. Roof lanterns work incredibly well above a central kitchen island or dining table as the light is taken from all sides, meaning it is spread out throughout the day rather than just concentrated at one point. The glass sides also create quite a stunning focal point in a room.

    Flat rooflights probably work best in contemporary, minimal projects where the roof plane is deliberately on show. They are also the right choice if you are restricted – be it by budget, planning rules, or aesthetics – on how far the rooflight can project above the roofline.

    The pitch of the roof is a practical consideration too. Flat rooflights need a minimum fall for drainage – usually between 2 and 15 degrees depending on the manufacturer. If you are working with a pitched roof section, then a pitched skylight that matches the roof angle is the best solution. Try to fit a flat skylight onto a very steeply pitched roof and the stresses on the frame (not to mention the poor drainage) will cause problems.

    Reflective surfaces – making the most of what you let in

    It is only half the battle to get daylight into the space. The kitchen’s internal surfaces determine how much of that light is absorbed. A dark kitchen with matt-finish units and black worktops will take in most of the light entering from above, creating a few bright spots directly under the glazing and general gloominess everywhere else.

    Light-reflecting choices will bounce light further into the room. Gloss or semi-gloss cabinet fronts spread the light over horizontal surfaces. Similarly, pale or warm-neutral countertops – especially polished stone or solid surface materials – behave like a mini light source, reflecting daylight back up and into the room. A mirror or high-gloss tile backsplash behind the cooking zone functions in the same way: it multiplies instead of swallows.

    This does not mean every kitchen must be white. A dark island base combined with light-coloured upper cabinets and a pale worktop satisfies the eye’s need for contrast while reflecting enough light to keep the space from feeling oppressive. The guiding principle is light-redirecting rather than just ‘choose light colors’.

    Ceiling color has more of an impact than most people think. A white or near-white ceiling over a skylight bounces the incoming light downwards and sideways, washing out the contrast between the lit column under the glass and the surrounding room. A dark ceiling will absorb that light.

    Ventilation through the roof

    A kitchen that serves as a multi-functional space will undoubtedly produce heat, steam, and smells associated with cooking multiple times over the course of a day. Mechanical extraction can deal with the immediate cooking fumes, but it cannot offer a solution to the wider thermal comfort of a room that someone may be using to work or eat in.

    Opening rooflights – whether manually operated or motor-driven with a rain sensor – can take advantage of the stack effect. Opening at the ceiling, warm air is able to escape through roof level glazing, such as a rooflight, drawing cooler air in through lower level windows or doors, cooling the room down. A kitchen that is expected to run warm throughout the morning’s cooking activity and into a working afternoon would suggest that passive ventilation of this kind can make a very real and practical difference elsewhere in the space.

    Electric opening rooflights with rain sensors are the only real option for roof level glazing. Nobody wants to clamber up onto a table to close a rooflight because the weather has changed, but most are now integrated with a remote or wall switch and some can connect to the smart home.

    Layering artificial light to extend the day

    The kitchen receives natural daylight until late afternoon. A good design should consider how this room will be used in the evening. Light isn’t always about choices at the design stage; sometimes it’s just physics.

    Natural daylight will always give you the best light for most kitchen tasks, but expecting a room that you need bright from 7 am to 2 pm to still be working for you at 7 pm takes more than a couple of nice pendant lights. You can divide the approaches to this into three overlapping categories. Original lighting design is a bit of a dark art but what follows is a solid introduction.

    The physics part is that no matter how architecturally ‘sunny’ a room is, daylight will never shine into boxes (base units, wall units), and in the very nature of an extension, half the periphery will not get enough light most of the time. That’s why you still find lighting designers on even the most glassy modern projects. And it’s not just the light levels; color temperature and the movement of light (shadows) are equally important.

    A good rule of thumb is that any point in the kitchen that you will look at in horror if you spill something on it at 11 am needs a specific light source. So that’s your worktop and your hob. The sink might just squeak by as having enough light from the daylight but many kitchen designers will recommend a dedicated light over the sink as well. A bit more arguable is the concept that anything you see through glass needs to be seen in the same light. This makes lighting inside glazed doors a good idea.

  • Beginner Guide to Home Organization: Practical Steps to Declutter, Simplify, and Maintain Order

    Beginner Guide to Home Organization: Practical Steps to Declutter, Simplify, and Maintain Order

    You can create a calmer, more functional home without wasting time or money by focusing on small, consistent changes that fit your daily life. Start by identifying trouble spots, decluttering what you no longer use, and assigning a simple, repeatable place for every remaining item.

    They will learn practical, low-effort habits that make organization stick, such as sorting by use, using clear containers, and building short maintenance routines. This guide walks through core steps that turn one-time cleanups into lasting systems so the space supports daily activities rather than complicating them.

    Core Steps for Getting Organized at Home

    This section outlines practical actions: assess current spaces, decide what to keep or remove, use targeted methods and checklists, apply room-specific systems, and invest in smart storage and tools. It focuses on repeatable steps that yield an organized, usable home.

    Understanding the Value and Impact of Home Organization

    They begin by measuring where the home wastes time or space: clothes piled on chairs, kitchen counters cluttered, or half-used supplies in multiple rooms. Quantifying small daily frictions—minutes spent searching for keys or shoes—makes the benefits of organization tangible.

    Organization improves cleaning efficiency and reduces stress. An organized closet with labeled shelving and drawer dividers shortens morning routines. A clearly arranged pantry and storage bins decrease food waste and duplicate purchases.

    Home organization also affects resale and maintenance. Well-arranged spaces highlight usable square footage; a storage bench or under-bed storage demonstrates functional options to buyers. Professional organizers often document before-and-after photos to show value for clients.

    Decluttering Basics for Beginners

    They start small: pick one drawer, one shelf, or one category (like shoes) and finish it entirely before moving on. Use four clear decisions: keep, donate, trash, relocate; place items into labeled boxes or bags immediately.

    Time-box sessions to 20–45 minutes to avoid fatigue and decision paralysis. Work with a simple kit: trash bags, donation boxes, a label maker, and a notepad for items to replace or repair. For sentimental items, use a dedicated small box and limit its size.

    Set concrete rules: if an item hasn’t been used in 12 months, consider donating; if it’s damaged beyond repair, recycle or trash it. They keep receipts and warranties together in a labeled folder to prevent redundant purchases later.

    Decluttering Methods and Checklists

    They choose a method that fits personality and scale: KonMari for category-driven decisions, room-by-room for visible wins, or minimalist rules for ongoing maintenance. Each method demands consistent follow-through and a clear destination for removed items.

    Use a decluttering checklist to track progress. Example checklist items: clear countertops, empty under-sink cabinets, sort clothing into seasons, remove duplicates, and label storage bins. Checklists help when hiring home organization services or a professional organizer to ensure shared expectations.

    Combine methods: start with KonMari for clothing, then switch to a room checklist for kitchens and bathrooms. Create a digital checklist or printed chart with target dates, so they can measure milestones and schedule trips to donation centers or self-storage if needed.

    Room-by-Room Organization Strategies

    They address high-impact rooms first: entryway, kitchen, bedroom, and bathroom. In the entryway, add a shoe rack, coat hooks, and a small storage bench with labeled baskets for mail and accessories to prevent clutter from entering the home.

    In kitchens, group items by task (baking, prep, coffee). Use drawer organizers, clear storage boxes, and labeled pantry bins to keep similar items together. Place frequently used tools in easy-to-reach drawers and lesser-used appliances in upper cabinets or under-counter storage.

    Bedrooms benefit from closet organization: install adjustable shelving, use slim hangers, and add under-bed storage boxes for off-season clothing. Bathrooms require shower caddies, over-the-door racks, and small clear bins for medicines and cosmetics to avoid countertop clutter.

    Smart Storage Solutions and Organization Tools

    They prioritize multipurpose furniture: ottomans with hidden storage, storage benches for entryways, and beds with built-in drawers to maximize square footage. Use uniform storage boxes and clear bins so contents remain visible and stackable.

    Invest in specific tools: drawer dividers, shelf risers, hanging shoe organizers, a label maker, and a rolling cart for mobile storage. For papers, use an inbox-and-action-file system; for small hardware, use compartmented storage boxes with labels.

    Choose materials that suit each space: moisture-resistant bins for bathrooms and breathable fabric boxes for clothing. Consider self-storage temporarily during major downsizing, or hire home organization services and professional organizers for large projects.

    Organizing Frequently Overlooked Spaces

    They tackle spots that silently accumulate clutter: laundry rooms, garage corners, linen closets, and the back of kitchen cabinets. Use wall-mounted pegboards, magnetic tool strips, and clear bins to convert awkward nooks into functional zones.

    Under-bed storage and vertical space in closets often remain unused. Add under-bed storage boxes, stacking shoe racks, and hanging shelf organizers to reclaim that capacity. Label each bin and keep an index near the closet entrance.

    Don’t forget digital and paper zones: set up a small command center for bills, warranties, and manuals in labeled boxes or a binder. Regularly schedule a 15-minute weekly sweep for these areas to prevent clutter from reappearing.

  • How to Build Strong Parent-Child Communication: Practical Strategies for Trust and Connection

    How to Build Strong Parent-Child Communication: Practical Strategies for Trust and Connection

    You’ll build stronger conversations when you prioritize consistent listening and clear, calm responses that respect your child’s feelings. Start by creating predictable moments for connection, and use simple questions and reflections to help your child open up.

    They’ll notice when you match your words to your actions and keep expectations age-appropriate. The next sections show practical strategies for everyday talks, handling conflicts, and deepening trust so you can communicate more effectively as a family.

    Essential Strategies for Strong Parent-Child Communication

    Strong parent-child communication rests on clear listening, consistent expectations, emotional safety, and daily habits that show respect. The following strategies explain specific actions parents can take to improve understanding, model behavior, and handle setbacks.

    Understanding the Importance of Parent-Child Communication

    Parents should recognize that communication shapes trust, behavior, and emotional development across childhood and adolescence. Regular, meaningful exchanges reduce misunderstandings, lower behavioral problems, and make children more likely to share concerns about school, peers, or mental health.

    Identify moments for conversation: mealtimes, rides, and bedtime routines provide predictable windows for connection. Track patterns: note when a child withdraws or becomes defensive—these signals show where to adjust tone or timing. Prioritize consistent brief check-ins over rare long talks; routine contact keeps lines open and makes difficult topics easier to introduce.

    Creating a Safe and Supportive Environment

    A safe environment combines physical privacy with emotional predictability so children feel free to speak. Remove immediate threats to privacy (turn off the TV, stop multitasking) and offer undivided attention for at least a few minutes when a child initiates talk.

    Show predictable reactions: maintain a calm voice, avoid punitive responses, and set limits without shaming. Use neutral phrases like “Tell me more” or “I want to understand.” Reinforce safety with concrete actions—keep promises, respect confidences when appropriate, and follow through on agreed solutions.

    Practicing Active Listening and Empathy

    Active listening means giving full attention, paraphrasing content, and reflecting feelings rather than immediately problem-solving. Use short verbal acknowledgments (e.g., “I hear you,” “That sounds hard”) and mirror emotions: “You seem frustrated about homework.”

    Ask clarifying questions only after paraphrasing so the child feels heard first. Validate feelings without endorsing harmful behavior: “It makes sense you’re angry; we still need to find a safe way to handle it.” These techniques strengthen trust and teach children how to express emotions clearly.

    Using Age-Appropriate Language and Open-Ended Questions

    Match vocabulary and concepts to the child’s developmental level to avoid confusion and encourage expression. For preschoolers, use simple concrete terms and short sentences. For school-age children, expand explanations and ask about specific situations. For teens, adopt direct but respectful phrasing and invite problem-solving.

    Favor open-ended prompts that invite detail: “What happened at recess?” instead of “Did you have fun?” Use choices to guide younger children (e.g., “Do you want to do homework before or after snack?”). For older children, ask reflective questions like “What would you try differently next time?” to promote critical thinking.

    Modeling Positive Communication and Behavior

    Children learn communication styles by watching caregivers. Model calm disagreement resolution: state feelings with “I” statements, acknowledge the other person, and propose a solution. Demonstrate apology and repair when parents make mistakes—this teaches accountability and conflict management.

    Show nonverbal consistency: maintain eye contact, appropriate posture, and steady tone. Reduce multitasking when interacting to demonstrate priority. Use explicit commentary about choices: “I’m checking my calendar now; I’ll be fully present in 10 minutes.” That transparency teaches respectful time boundaries.

    Setting Clear Boundaries and Consistency

    Clear rules combined with predictable consequences help children feel secure and understand expectations. State rules plainly, in positive terms, and limit the number of rules to what a child can reasonably remember and follow.

    Apply consequences calmly and consistently; avoid escalating emotions during enforcement. Use logical consequences connected to behavior (e.g., lost device time after missed chores). Review and adjust rules periodically with older children so expectations evolve with growing responsibilities.

    Encouraging Emotional Expression and Respect

    Teach children a vocabulary for emotions and a routine for naming feelings when they arise. Use short prompts like “Name the feeling” and model labeling by saying, “I feel stressed about work.” Encourage respect by setting norms: no interrupting, use a respectful tone, and no name-calling.

    Provide constructive outlets: drawing, journaling, or a brief walk to cool off before talking. Reinforce respectful expression with praise for effort: “You explained why you were upset and stayed calm—that helped us solve it.” That positive feedback strengthens both expression and respectful interaction.

    Overcoming Barriers and Fostering Continuous Improvement

    Identify common barriers—time constraints, parental stress, cultural differences, or a child’s fear of judgment—and address each with practical steps. Schedule brief daily check-ins, use family meetings for agenda items, and seek translator or cultural resources when needed.

    When conversations go poorly, debrief calmly: name what went wrong, state a corrective step, and try a different approach next time. Track progress with simple metrics (frequency of check-ins, number of resolved conflicts) and adjust strategies. Consider coaching, parenting classes, or family therapy if communication remains stuck despite consistent effort.

  • The Secret to Making Your Master Bedroom Feel Like a Five-Star Suite

    The Secret to Making Your Master Bedroom Feel Like a Five-Star Suite

    The Secret to Making Your Master Bedroom Feel Like a Five-Star Suite

    Walk into a well-designed hotel suite and something shifts immediately. The air feels calmer. Your shoulders drop. You want to sit down. That response isn’t accidental – it’s engineered through a specific set of sensory decisions that most people never consciously notice, which is exactly why they’re so effective.

    Start with the bed, not the walls

    Many times, when we read about interior design tips, the first things that are addressed are paint colors or furniture arrangements. However, these tips are often forgotten, ignored, or misunderstood. Let’s save that for later. The bed is the central piece of a bedroom, is the piece de resistance of any bedroom and the single greatest opportunity to set the tone for everything that follows.

    One of the hallmark techniques of a luxury hotel is something called a ‘bed-scape’. You aren’t just throwing things on the bed, you are intentionally layering things on top of the bed to the point it looks built – a bed throw here, this little cushion there. It’s that effortless-but-not-effortless look. The ingredients are a fitted sheet (go 400+ thread count cotton. You’ll appreciate the difference when your skin touches it), flat sheet, light blanket, generously sized drapey duvet, a combo of your sleeping pillows and then two or three decorative pillows in coordinating fabric. Voilá, bed-scape!

    Control light like a professional

    Managing natural light is a small aspect of a bedroom that makes it photogenic and actually functional for sleeping. Roller blinds are not what you will find in upscale hotels. Generally, they will use a combination of blinds or shades – a sheer layer for allowing light during the day and heavier processing for blocking all light when sleeping.

    For a lot of projects that you do yourself, the window covering is only seen as a last step. But really, investing in luxury window coverings is the difference between a well-decorated room and a professionally designed room – a look that is properly scaled and sits flush to the ceiling, and extends far past the window on both sides, to make the window look architectural and not added on.

    The flaps or lighting bleed at the side of the shade is a sign you have cheap coverings – you certainly won’t find it in a luxury high-end room. Total darkness has a measurable effect on sleep quality, and that attention to detail is what sets a great bedroom apart.

    Build a color story, not a color scheme

    The difference between a beautifully restful bedroom and one that just looks well-designed has a lot to do with the density of the colors used. A good rule of thumb is that you’ll rarely find strong primary colors in a five-star vacation hotel bedroom. Instead of pure colors, they opt for colors that have white, black, or gray mixed into them. So, for example, you get a warm greige, and no beige at all, a slate blue in place of cobalt, a washed sage green rather than green.

    If you think about what colors promote sleep and relaxation, those are the colors for you. White, gray, black, and these drained-of-life hues also happen to be what shows up in research as optimal for aiding relaxation and sleep. Your brain is inactive, but you’re not dull. The pigment in bedroom design should not get your neurons firing like it’s New Year’s Eve. A bedroom isn’t a space for fireworks.

    Proportion and the negative space problem

    Many bedrooms look cluttered, though they’ve been recently cleaned. The problem? Furniture that’s fine in another setting – the nightstand you brought from your former apartment; the dresser you can fit both a changed relationship and a changed lifestyle into a corner already – often tends to be unfit for the room.

    Small pieces often do more than grand gestures. Moving and experimenting with the furniture you do have will soon make it apparent what will fit, what won’t, and what was unnecessary in the first place.

    Don’t do anything, just give the thing in your room some competition before adding to the pile.

    The sanctuary corner

    A bedroom designed only for you to sleep will never feel like a proper suite. A good hotel room will have at least one seat – not an office chair, but a nicely designed piece you wouldn’t mind having in your living room. That seat exists to invite you to read a book or contemplate the view when your day is winding down. Most good rooms also have a place that isn’t the bed but is meant for napping, sleeping, or curling up to watch TV. Those two functions require at least two blocks of space, each with its own source of light, natural or artificial.

  • How to Manage Irregular Income: Practical Strategies for Budgeting, Saving, and Planning

    How to Manage Irregular Income: Practical Strategies for Budgeting, Saving, and Planning

    They can build a reliable financial routine even when paychecks arrive unpredictably. Create a baseline budget using the lowest monthly income you expect, keep a buffer equal to several months of expenses, and automate savings when any payment lands.

    This piece lays out practical steps that work for contractors, freelancers, commission earners, and seasonal workers. Expect clear tactics on tracking cash flow, smoothing income, and aligning spending with irregular receipts to reduce stress and gain control.

    Mastering Financial Stability with Irregular Income

    This section breaks down practical steps to stabilize cash flow, allocate money to priorities, and build savings that absorb unpredictable pay. Each part centers on concrete actions: identifying income patterns, listing essential costs, creating baseline and zero-based budgets, and separating savings for specific uses.

    Understanding Irregular and Variable Income Streams

    Irregular income includes freelance pay, gig work, commissions, royalties, tips, and fluctuating business revenue. They should be tracked by date and amount for at least six to twelve months to calculate realistic averages and seasonal swings.

    Create a simple spreadsheet or use budgeting software to log each deposit and its source. Record gross and net amounts, frequency (daily, weekly, monthly), and one-off windfalls. Calculate three figures: lowest monthly total, median monthly total, and 6–12 month average. Use the lowest-month figure for conservative planning and the average for growth goals.

    Distinguish guaranteed variable income (e.g., recurring contract work) from truly unpredictable income (one-off gigs). Label irregular income sources by reliability, so he or she can weight them differently in budgets and decide which to treat as savings versus spending.

    Establishing Essential and Fixed Expenses

    Essential expenses are non-negotiable costs required for daily living and work: rent/mortgage, utilities, insurance, minimum debt payments, groceries, transportation, and business expenses tied to earning income. Fixed expenses recur with predictable amounts; variable expenses fluctuate but remain necessary.

    Compile a list and prioritize by due date and legal consequence of nonpayment. Use direct debits or scheduled transfers to ensure bills are paid on time. If bills vary (electricity, fuel), calculate a 12-month average to include in the monthly baseline.

    Tag each expense as essential/fixed, essential/variable, or nonessential. That labeling helps when income drops; he or she can trim nonessentials first and negotiate or defer variable essentials second (e.g., ask for a payment plan on medical bills).

    Building a Baseline and Zero-Based Budget

    A baseline budget covers essential expenses using a conservative income estimate, typically the lowest monthly total from historical data. This baseline becomes the minimum threshold that must be funded before discretionary spending.

    A zero-based budget assigns every dollar an explicit job: bills, savings, taxes, and spending. Start with baseline essentials, then allocate to savings buckets (emergency, tax reserve, sinking funds), and finally to flexible spending. Each month, adjust allocations to reflect actual receipts.

    Use a simple worksheet: row for each category, column for baseline amount, projected allocation, and actual. Reconcile at month-end. When income exceeds baseline, prioritize tax withholding and savings increases rather than immediately expanding lifestyle.

    Creating and Maintaining an Emergency Fund

    Target an emergency fund sized to income variability and job risk—commonly 3–12 months of essential expenses. For highly irregular earners, err toward 6–12 months to cover income gaps and unexpected costs.

    Fund it consistently by automating transfers into a separate high-yield savings account on payday or weekly. If pay varies, set a percentage rule (e.g., 10–25% of each payment) to deposit when money arrives. Treat the fund as untouchable except for true emergencies.

    Label the account clearly and avoid linking it to daily spending. Periodically reassess the target after major life changes (new client base, industry downturns) and increase contributions when monthly income exceeds the long-term average.

    Separating Savings: Buffers, Emergency, and Sinking Funds

    Use multiple accounts to prevent mixing goals. A buffer covers short-term timing gaps (2–4 weeks of variable expenses), the emergency fund covers major shocks (months of essentials), and sinking funds target planned but irregular costs (taxes, repairs, annual insurance).

    Open at least three dedicated accounts or sub-accounts: Buffer, Emergency, and Sinking Funds. Automate or manually split each paycheck using set percentages tied to income patterns—e.g., 10% buffer, 15% emergency, 5% sinking—adjustable as cash flow stabilizes.

    Designate sinking funds for specific items with target amounts and deadlines. Track progress visually (simple progress bars or spreadsheet formulas), so he or she can see when a fund is fully funded and pause contributions to redirect money elsewhere.

    Tracking Cash Flow, Reviewing Income Patterns, and Adjusting Regularly

    Track inflows and outflows daily or weekly to notice trends quickly. Use bank feeds or budgeting apps to categorize transactions automatically and reconcile them against income logs.

    Review income patterns monthly and perform a deeper analysis every quarter. Compare actuals to the baseline and average figures; calculate variance percentages and identify seasonal peaks or troughs. When patterns shift permanently, reset the baseline and reallocate savings.

    Establish simple rules for windfalls: allocate fixed percentages to taxes, emergency fund, retirement, and lifestyle. Reforecast cash flow when a major client is gained or lost, and adjust automatic transfers immediately to maintain coverage of essentials.

    Prioritizing and Automating Savings and Expenses

    Automation reduces decision fatigue and ensures priorities get funded first. Set up scheduled transfers: bill payments for fixed costs, percentage-based transfers to emergency and sinking funds, and a tax reserve account timed with typical tax deadlines.

    Prioritize mandatory obligations and tax reserves before discretionary spending. When income proves higher than baseline, route the extra first to tax obligations and emergency savings, then to retirement and planned investments. If income is lower, pause discretionary and some sinking fund contributions temporarily.

    Keep a “priority ladder” list that ranks transfers by importance and payment order. If an unexpected shortfall appears, follow the ladder to pause lower-priority moves without missing critical payments.

    Leveraging Realistic Budgeting Strategies for Financial Confidence

    Adopt conservative assumptions: budget to the lowest reliable monthly income and treat extra receipts as upside. Use a rolling three- to six-month average to smooth spikes and avoid overcommitting.

    Combine zero-based budgeting for monthly accountability with percentage rules for savings and taxes. Use scenario planning: build a worst-case month, a typical month, and a best-case month, and create action plans for each (e.g., reduce subscriptions, delay nonessential purchases).

    Regularly update goals and metrics: emergency fund target, buffer size, and sinking fund timelines. Measure financial confidence by tracking months of covered essential expenses and the trend in emergency savings; adjust contributions until coverage meets the chosen safety margin.

  • How to Design a Functional Kitchen Layout for Your New Build

    How to Design a Functional Kitchen Layout for Your New Build

    How to Design a Functional Kitchen Layout for Your New Build

    When you’re building a new home, the kitchen is the one room where early decisions have the longest tail. Get the layout wrong and you’re living with it for decades. Get it right and the space almost runs itself.

    The difference usually comes down to when you make the decisions – not what finishes you choose.

    Start with function, not finishes

    Most people go about designing a kitchen all wrong. They pick a cabinet style they gravitate towards, or a benchtop material they love the look of, and that’s where they start. But it’s the wrong place to start. Before any of that, you should understand how you actually use a kitchen day to day.

    The work triangle – the spatial relationship between the stove, sink, and refrigerator – is still the most reliable framework for this. Each leg of the triangle should measure between 4 and 9 feet. Too close and you can’t open the oven and the fridge at the same time. Too far and you’re making trek after unnecessary trek.

    In a new build, you have the luxury of being able to move plumbing, electrical, and gas before the walls ever go up. It’s a kind of magic that renovators do not have access to (level floors in old houses, anyone?). Use it wisely.

    Match the layout to the floor plan

    The three most commonly used kitchen designs are the galley, the L-shape, and the U-shape. There is no right or wrong choice, but one may be more suitable for you depending on your lifestyle.

    The galley design is great for small homes as it makes use of the available room. The working triangle in this layout is kept to a minimum as all the worktops and appliances are in a line. The downside is that it can be a thoroughfare for people wanting to access other rooms in the house. This means traffic will be going through the workspace which could be dangerous and frustrating.

    The L-shape offers more flexibility as one leg of the L can be longer than the other, suiting the layout of your home. An open-plan design often incorporates the L-shaped layout as the open end leads to the living or dining room. This gives the kitchen a more spacious feel but can make it easier for kids and pets to get in the way.

    The U-shaped design provides you with a large working area and plenty of storage, as cabinets and appliances can be fitted around the room. There is often enough room to eat in the kitchen too. Unfortunately, if the room is too small there can be problems with traffic flow, as with the galley design.

    Design the social zone separately from the cooking zone

    Open-plan kitchens inadvertently led to an issue most homeowners hadn’t expected: all of a sudden, everyone wants to hang out in the kitchen, but then they stand directly in your cooking path.

    The solution? Design a specific social zone. An island with seating along one side subtly draws guests to the kitchen, yet it doesn’t invite them smack-bang into the work triangle. They’re right there, but not underfoot.

    If your floor plan allows, a butler’s pantry is an even better buffer. It gives you a secondary prep and storage space that can get used by helpers, while still allowing the main kitchen to be cleared for the cook.

    For a renovation, the butler’s pantry can usually stand proud of the existing walls, if they aren’t load-bearing. For an even cleaner retrofit, consider the rough-in of electrical and plumbing at the frame stage of a new build, even if the full butler’s pantry isn’t within budget for a while.

    Build the storage around how you actually cook

    Regular under the counter cabinets are inefficient. You’ll have to go down on your knees each time you want to get a pot because of the deep shelves near the floor. Deep drawers can fulfill the same task more effectively – everything will be in sight and in reach and nothing will get buried.

    This is where the construction phase will determine the success of your plan again. You will need to figure out the configurations of the drawers, the pull-out systems in the pantry, and all the hardware for the cabinets with soft-closing in advance of the installation. It will be more expensive and never satisfactory to add these storage solutions within a finished cabinet.

    It’s always the details that trip you up. Landing space is what majority of the people forget to account for. You have to make sure you have at least 15 inches of counter right next to the oven and the same thing next to the refrigerator. These clearances aren’t optional, they will ensure your safety and your ability to work fast in the kitchen.

    Finally, working with experienced kitchen installation newcastle professionals at the fitout stage means the cabinetry, benchtops, and appliances are positioned according to the exact frame of your new house – not adapted around limitations that didn’t need to exist.

    Get the lighting and electrical right before the walls go up

    Proper task lighting over places where food will be prepared is essential to keep fingers and knives in full view of each other. It sounds small, but great lighting is the difference between something being a dream to work at or a nightmare to clean.

    The new build window closes fast

    When the frame is constructed, plumbing and electrical work are established and cannot be easily changed. The choices you make during the design and framing process become the ultimate limit for every subsequent step. A well-functioning kitchen is not a complex one – it’s determined before the walls are even put up, not afterward.