Author: Nuru

  • Creating Comfortable Living Spaces Your Whole Family Will Use

    Creating Comfortable Living Spaces Your Whole Family Will Use

    Creating Comfortable Living Spaces Your Whole Family Will Use

    Every home has that one room no one really spends time in. It’s the formal living room with the perfect couch. Or maybe the dining room used only twice a year. Sure, the furniture is aesthetically pleasing, but it’s not aligned with how families truly function. Creating spaces that welcome everyone is not about adhering to design principles; it’s about knowing how your unit moves, engages, and operates every day.

    Creating Spaces That Make Sense

    You can’t buy furniture without first understanding how family members occupy a space. Before making too many plans, it’s good to see where people naturally gravitate. Where do kids drop off their backpacks? Where does everyone end up by 7 pm? Where are rooms completely ignored?

    These patterns say everything about your needs as a household. If everyone’s always in the kitchen and the living room is completely ignored, someone in the family is not an issue; the furniture layout is. If the couch is too tailored and uncomfortable or all the sitting arrangements are facing a television and not one another or there’s no one to put down a drink without trekking ten feet to a side table.

    The spaces that work for families need to accommodate realistic behavior. Homework needs to happen at the table, games need to spread across the floor, and someone needs to be lounging while reading, feet on couch, while simultaneously scrolling through their phone. Ignoring this only creates tension and space that’s rendered useless.

    Creating Furniture Options That Are Realistic

    What makes furniture used versus not is standard after practical considerations. Comfort is first. No one wants to sit at an attractive chair that looks like it’s made of concrete. But durability works just as well in busy households.

    For example, families looking for pieces that work both design and function typically look toward locations that understand these competing facets. Ehler’s Furniture specializes in finding furniture that’s made for daily use yet looks intentional and aesthetically pleasing.

    When it comes to fabric, there are decisions most don’t realize. Microfiber is more stain resistant than linen. Leather becomes more attractive as it wears instead of looking trashy after a couple of years. Performance fabric made for high-traffic areas might cost a bit extra at the outset, but it’s worth it in the long-run. These aren’t the sexiest of details to consider, but they’re critical if you want to ensure you’re not stressing out about spills all the time.

    The same goes for wood options. Solid hardwoods dent less than veneers and can be refinished multiple times throughout their life. Dark stains hide scratches better than lighter colors. Distressed finishes hide dings from wear and tear from active homes. These are not ugly options; they’re just sensible in telling yourself what finishes will only add maintenance stress.

    Creating Spaces for Optimal Flow and Connection

    How furniture sits in a room changes how people use that space entirely. Furniture shoved into corners facing walls in an effort to focus on a tv creates one style of living space compared to sofas and chairs in a circle.

    Family rooms mostly benefit from an abundance of zones instead of one large furniture unit. A major place to sit to watch shows or talk, a corner with light to read a book, maybe even a spot to encourage kids’ play without taking over the room’s personality entirely.

    These zones do not need walls or defined areas; they simply need intentional placement to give people options.

    Traffic patterns are much more critical than what glossy magazines suggest. Rooms need pathways; they cannot be blocked by designs that naturally occur. There’s nothing less conducive to use a space when you have to walk around an obstacle course each time you want to get from point A to B. Leave at least three feet for main pathways; two feet is good enough for secondary ones.

    Then there’s the debate about having a coffee table versus not. Families need that central feature for food or craft projects; others find them more annoying than functional, especially with younger children who crash into them or use them as springboards into couches. An ottoman with trays can compromise, soft enough so no one gets hurt, functional enough to hold a drink, easy enough to move aside when space is needed.

    Making Spaces Liveable and Functional

    You know that ceiling lighting feels like you’re in an institution, so do your kids. Families spend their evenings together, making imposing ceiling fixtures less than engaging when establishing comfort.

    Layered lighting transforms spaces and makes them livable. Table lamps, floor lamps, string lights create ambient qualities that make spaces inviting. Dimmers allow control over level for different activities, homework requires brightness, movie night needs lower levels.

    Task lighting should not be the only source within a shared space but matters where intentionality is necessary.

    Sunlight varies throughout day, affecting furniture placement as well. Your reading chair should be in a place where afternoon light won’t cast out work; screens shouldn’t be facing windows that create glare; these nuances seem minor until you’re squinting to read or adjusting blinds every five minutes.

    Creating Storage That Doesn’t Feel Like Storage

    Nothing ruins an inviting space faster than clutter, but that doesn’t mean everything must go away into closed cabinets and drawers across the house. Open storage options can look intentional if done correctly.

    For example, shelves become aesthetically pleasing ways to house books and games, even decorations. Baskets stuck under a console table can serve as shoe or toy storage without looking institutionalized. Window seats with lift up lids serve dual purpose, as seating and hidden storage under cushions.

    Everything needs a place so daily pick up doesn’t become a headache requiring major energy.

    Kids require even more storage options since their interests shift frequently. Toys come in and out as desires change; art supplies continue to grow; school papers add up fast. Built-ins or pieces with hidden storage components assist in managing this consistent influx without bombarding rooms with kiddie chaos.

    Making Spaces Work Across Ages

    What works for toddlers does not work for teenagers, but always replacing furniture becomes costly across the board. The best way comes from compromise, pieces that can grow into themselves as needs change.

    Sturdy coffee tables can become desks. Deep bookshelves can hold board games, then textbooks, then college keepsakes. Sectional sofas can be arranged into something else as room division shifts.

    Ultimately this type of foresight requires anticipating what spaces might need before tenable transformations may occur within five or ten years.

    Baby-proofing does not have to mean ugly furniture; rounded edges, solid bases, and no tip-over options can come with grown-up looking finishes. The goal is safety without looking like children built the space.

    Reality Check

    Comfortable family spaces are not magazine-perfect, and they shouldn’t be. They should show signs of life, a throw blanket draped over a sofa, books stacked on tables, pillows rearranged from intentional use.

    These details show what works, and how great living conditions include details just out of place enough because they serve their purpose.

    The best family rooms connect aesthetics and functionality so well that people don’t think about stain-resistant fabric or thoughtful placement, they just appreciate how it feels welcoming and works for how they live, and that’s when your furniture decisions shine: when space naturally welcomes people for whatever chaos or ease of day-to-day life comes along.

  • Budget-Friendly Ways to Refresh Your Bedroom on a Tight Budget

    Budget-Friendly Ways to Refresh Your Bedroom on a Tight Budget

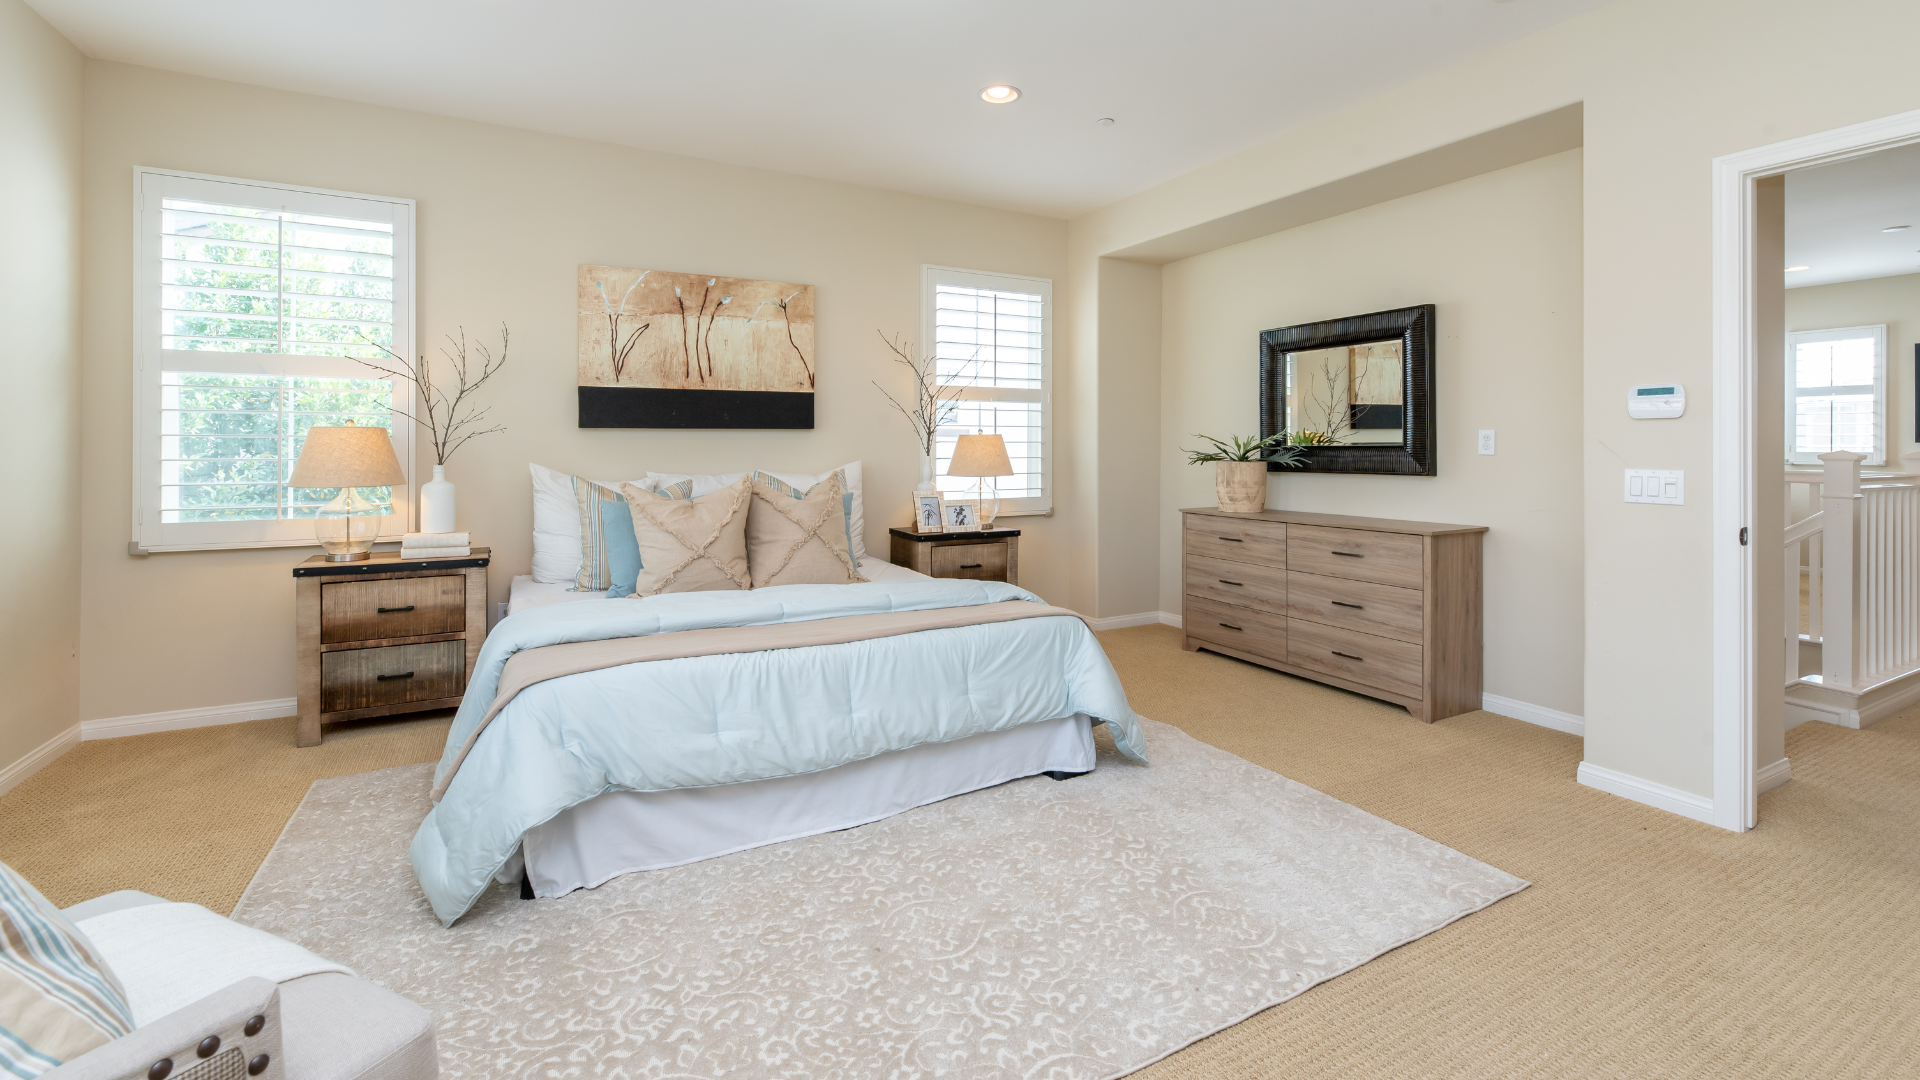
    A bedroom makeover doesn’t have to break the bank. With a little creativity and some resourceful planning, anyone can transform their space into a more inviting and personalized retreat. Budget-friendly ways to refresh your bedroom include simple changes like updating decor, reorganizing furniture, and incorporating color through accessories.

    By focusing on affordable options, individuals can create a space that reflects their style without significant financial investment. Small upgrades, such as swapping out pillows, rearranging artwork, or adding plants, can make a notable impact. These changes not only enhance the room’s aesthetic but also improve its functionality.

    Readers will discover practical tips and clever ideas that can be implemented easily, ensuring anyone can enjoy a rejuvenated bedroom environment. Whether through DIY projects or strategic purchases, refreshing a bedroom is attainable and enjoyable.

    Declutter and Reorganize Your Space

    A well-organized bedroom can create a refreshing atmosphere. Employing effective storage solutions, rearranging furniture, and simplifying surfaces it can transform the room without significant costs.

    Maximize Storage Solutions

    Using storage effectively is essential for a bedroom reset. Invest in under-bed storage bins to utilize otherwise wasted space. These containers are ideal for seasonal clothing or extra linens.

    Consider multi-functional furniture, such as ottomans with storage inside. They provide seating and serve a purpose in reducing clutter.

    Floating shelves can also help display items without crowding surfaces. Utilize vertical space by adding shelves above dressers or nightstands. This approach not only saves floor space but also provides a decorative element.

    Refresh Room Layout

    Revisiting the room layout can drastically change how the space feels. Moving the bed can create a new focal point. For example, positioning the bed against a different wall can enhance natural light or improve flow.

    Clearing pathways is also vital. Ensure there is enough room to navigate easily.

    Additionally, aligning furniture can improve harmony. Aim for symmetry with nightstands or lamps to create visual balance and enhance comfort in the space.

    Beyond rearranging furniture, revisiting the room layout can also involve subtle design or structural updates. Adding a roof or skylight hatch, for instance, can flood the room with natural light, instantly making it feel brighter and more spacious.

    Likewise, a statement headboard or an accent wall behind the bed can also establish a strong focal point while adding character and depth, and simple window updates, such as switching to lighter curtains or improving window placement, can significantly improve light flow and overall ambience.

    Additionally, if the bedroom shares an exterior wall, investing in siding replacement services can significantly improve both comfort and aesthetics. Updated siding enhances insulation, reduces outside noise, and helps regulate indoor temperature, creating a calmer, more restful environment while also refreshing the home’s exterior appearance.

    Simplify Surfaces and Shelves

    Cluttered surfaces can detract from a serene environment. Assess items on dressers and nightstands. Keep only the essentials that serve a purpose or bring joy.

    Use trays or decorative boxes to contain small items, such as keys or jewelry. This organization method helps maintain a cleaner look.

    Regularly evaluate what can be removed. Seasonal decorations or unused items are often good candidates for donation. Keeping surfaces clear promotes a calming atmosphere, which is crucial in any bedroom refresh.

    Affordable Decor Upgrades

    Refreshing a bedroom can be achieved through budget-friendly decor upgrades. Simple changes in color and the introduction of personal touches can greatly enhance the space without breaking the bank. Here are some effective strategies.

    Update the Color Palette

    Changing the color palette can dramatically transform a bedroom’s atmosphere. Opting for lighter shades can make the room feel more spacious. For a quick refresh, consider repainting an accent wall in a bold color.

    While a fresh coat of paint can be a budget-friendly update, the quality of the finish and the choice of color are paramount for lasting impact. Professional painters offer not only meticulous application but also expert color consulting, helping homeowners select shades that enhance mood and complement existing decor.

    For those in the Edmonton area seeking to elevate their home’s interior or exterior with precision and quality, engaging experienced home painters in Edmonton can ensure a flawless, durable result. Their expertise can transform a simple color change into a significant aesthetic upgrade, adding genuine value and curb appeal to your property.

    Using removable wallpaper is another option. It allows for a temporary change without a long-term commitment. Soft neutrals paired with vibrant hues create a balanced look.

    If painting is not feasible, new bed linens or curtains in updated colors can also make a notable difference. Combining different textures keeps the aesthetic interesting while remaining budget-friendly.

    Beyond walls and textiles, the flooring itself plays a pivotal role in defining a room’s character and comfort. Updating this foundational element can dramatically alter the perception of space and introduce new textures that complement your chosen decor. For those seeking both style and practicality on a budget, exploring options like vinyl flooring offers an excellent solution.

    Modern vinyl options are not only durable and easy to maintain but also come in a vast array of designs, mimicking natural wood or stone, providing a luxurious look without the hefty price tag. This allows for a significant aesthetic upgrade that stands the test of time, enhancing the room’s overall appeal and value.

    Add Pops of Color with Accessories

    Accessories provide an easy way to introduce color without a complete overhaul. Throw pillows in bright colors or unique patterns can add visual interest to a neutral bedspread.

    Rugs can also serve as statement pieces, offering both comfort and style. Consider incorporating decorative items, like vases or artwork, that reflect personal taste while adding vibrancy to the space.

    Creating a cohesive look is essential. Choose a few key colors and repeat them across various accessories for a harmonious effect. This method enhances the bedroom’s appeal while keeping expenses low.

    Incorporate Family Photos

    Incorporating family photos is a meaningful way to personalize a bedroom. Creating a gallery wall with various framed pictures can serve as a focal point in the room.

    Select a mix of frame styles for added character. This approach allows for creativity and can be done gradually as new memories are made.

    Photos not only add warmth but also invite nostalgia. Consider using string lights or clips to hang photos in a casual, relaxed manner. It’s an affordable way to share cherished moments while enhancing the decor.

    Enhance Comfort and Style on a Budget

    Upgrading the comfort and aesthetics of a bedroom doesn’t require a hefty budget. Simple changes in bedding, decorative elements, and greenery can transform the space into a cozy retreat.

    Refresh Bedding and Linen

    Updating bedding and linen can significantly impact a bedroom’s feel. Consider investing in high-quality sheets with a thread count of at least 300 for comfort. Soft, breathable materials like cotton or linen enhance sleep quality.

    Change duvet covers or bedspreads seasonally to freshen the look. Affordable options can often be found at discount retailers or online sales. Mix and match colors and patterns for a personalized touch, allowing for creativity without breaking the bank.

    Layer with Throw Pillows and Blankets

    Throw pillows and blankets add depth and comfort to a bed. A combination of textures, such as velvet and cotton, creates visual interest. Three to five pillows in varying sizes provide a cozy yet stylish look.

    Layering a soft throw blanket at the foot of the bed creates an inviting atmosphere. This simple addition not only enhances comfort but also allows for seasonal changes. Look for budget-friendly options in various colors to instantly elevate the room’s decor.

    Add Fresh Flowers or Plants

    Incorporating fresh flowers or plants can breathe life into a bedroom. Snake plants are an excellent choice as they are low-maintenance and improve air quality. Place a few small potted plants on nightstands or window sills for a fresh touch.

    A simple vase of seasonal flowers adds color and a pleasant aroma. This inexpensive decor can brighten up the space, making it feel more vibrant. Regularly changing the arrangements keeps the setting dynamic and engaging.

    Budget Shopping and DIY Solutions

    Refreshing a bedroom on a budget is achievable through strategic shopping and creative DIY projects. Unique finds from second-hand sources can elevate a space, while simple DIY upgrades can transform existing accessories.

    Find Unique Items at Flea Markets and Thrift Stores

    Exploring flea markets and thrift stores can yield unexpected treasures. Shoppers often discover vintage furniture, unique decor, and art that add character to a bedroom.

    • Flea Market Finds: Look for items like decorative mirrors or reclaimed wood shelves. These can serve as focal points or functional storage solutions.
    • Thrift Store Gems: Consider repurposing old vases or picture frames. A fresh coat of paint or new upholstery can breathe new life into these items.

    Taking the time to sift through these stores can result in unique pieces that reflect personal style without breaking the bank.

    Reimagine Accessories with DIY Projects

    DIY projects provide an opportunity to customize and refresh bedroom accessories. Simple tasks can have a significant impact on the overall aesthetic of the space.

    • Upcycled Decor: Transform ordinary items into decorative pieces; for example, paint old light switch covers to match new color schemes.
    • Personalized Art: Create custom wall art using canvas and paint or repurpose old photos beautifully. This adds a personal touch that store-bought art may lack.

    Engaging in these projects allows for creativity while staying budget-conscious.

    Upgrade Lighting Fixtures and Bedside Lamps

    Updating lighting can dramatically change a bedroom’s ambiance while being budget-friendly. New fixtures or lamp shades can refresh the space without major expenses.

    • Replace Fixtures: Swapping out dated lighting fixtures can enhance style. Look for affordable options at home improvement stores or online marketplaces.
    • Revamp Bedside Lamps: Simple upgrades, such as changing lampshades or adding decorative paint, can modernize older lamps.

    Adjusting the lighting not only improves aesthetics but also ensures the bedroom feels inviting and functional.

  • Timber Shrinkage and Why New Houses Develop Cracks in the First Year

    Timber Shrinkage and Why New Houses Develop Cracks in the First Year

    Walking through a new home six months after a family has moved in, you’ll normally find the same problem: tiny cracks in the plasterboard, gaps showing where the trim meets the walls or ceiling, and nails popping through the paint.

    Normally, the homeowners will be very concerned whether the contractor did poor workmanship or whether something structural is happening to the home. Ninety percent of the time, it’s neither. Timber is doing what timber does; it is adjusting to its new environment.

    New homes are supposed to be perfect, right? Everything fits perfectly together and there is no dirt anywhere. And it does fit perfectly together – on day one.

    However, timber is a natural product that is always reacting to moisture in the air around it. Therefore, as the house settles into its normal living environment, the timber in the walls adjusts. Not a lot, but enough to be visible in the finishes that are attached to it.

    What Is Really Happening Inside the Walls

    All timber that is used in the construction of homes is dried before being used. However, ‘dried’ does not mean completely free of moisture. It means the moisture level is low enough to work with during construction. Framing timber is typically dried to a moisture content of 15-19%.

    Although this is dry enough to meet the requirements of the building code, it is far from the final moisture content of the timber when it is located inside a finished and climate-controlled home.

    Once the home is built and people begin living in it, the interior environment of the home becomes much drier than it was during construction.

    The timber in the wall frames reacts to the drier environment by releasing more moisture until it stabilizes at the moisture level of the indoor environment. For most homes stabilized moisture level is approximately 10-12%. As the timber dries from approximately 15% to 10-12%, it shrinks.

    However, the shrinkage is not in length but instead in the width of the timber. A 90mm stud may shrink by approximately 2-3mm. Although 2-3mm is not excessive, there are many studs in a home, and they all shrink at slightly different rates depending on their location and what the surrounding humidity levels are. Construction methods are also important. Contractors like those who provide quality Timber Wall Frames WA often experience less dramatic movement since the timber had already been placed in relatively dry storage locations prior to assembly.

    Contractors who build their frames on-site using timber that has been exposed to varying weather conditions prior to construction will experience greater movement as the wood dries.

    Why Some Cracks Are Cosmetic and Other Cracks May Be Structural

    Cracks and gaps that appear in the first year of occupancy can be classified into various categories. Most of the cracks and gaps will be considered cosmetic — annoying but not structural.

    Small hairline cracks in the corners of doorframes, along ceiling lines, and/or in the center of plasterboard sheets are merely the result of the plasterboard reacting to the movement of the frame below it. Since the plaster cannot move, it develops cracks to relieve the stress. Nail pops occur for the exact same reasons. The stud shrinks away from the plasterboard slightly, and the nail that previously held the plasterboard in place now protrudes from the surface of the plasterboard.

    Nail pops are simple to repair — simply push the nail back into position and install additional nails adjacent to the original nail. Touch-up paint is required. Gaps between trim and walls and/or ceilings are a second common first-year occurrence. The trim is applied when all construction activities are complete, and the trim fits snugly against the walls and/or ceilings.

    When the frame dries and moves, gaps form between the trim and the walls and/or ceilings. Gaps of 2-3mm are commonly observed along the top of skirting boards and/or around door architraves. While they can be aggravating to homeowners who take pride in their home, these types of gaps are not indicative of structural defects. Structural cracks are the type of cracks that warrant concern.

    A crack that forms and is repaired and then reappears in the same location, multiple times throughout the year indicates a condition beyond normal timber shrinkage. Diagonal cracks that appear from the corners of windows and/or doors, particularly if they become larger over time, may indicate structural defects or improper bracing. Doors and windows that suddenly stick or refuse to operate properly require evaluation.

    Some seasonal sticking is acceptable — the timber expands due to increased humidity during the warmer months and contracts due to lower humidity during the cooler months. However, if a door that functioned properly suddenly requires force to close and remains stuck, the frame may have twisted or shifted beyond its expected tolerance limits.

    Seasonal Movement No One Warns Homeowners About

    There is a secondary aspect of the movement of timber in the walls of homes that occurs throughout the life of the home — the seasonal movement of the timber. During the warmest months of the year, the relative humidity in the home increases and the timber in the walls expands slightly. Conversely, during the coolest months of the year, the relative humidity in the home decreases and the timber in the walls contracts.

    Therefore, the home actually breathes in and out of the various humidity levels associated with the seasons. Consequently, cracks that were repaired during the colder months of the year may reopen during the warmer months, or gaps that were sealed during the warmer months may reopen during the colder months. The timber is performing the same dimensional dance it performed during the first year of the home’s existence, and the finishes are merely riding along with it.

    People who understand this phenomenon cease fighting it and accept the minor seasonal fluctuations in the performance of their home. Those who continue to fight it will be constantly repairing the same cracks and gaps. The degree of seasonal movement is dependent on several factors including the species of timber used in the framing of the home.

    Each species of timber exhibits a different response to the relative humidity changes that occur seasonally. For example, while pine is moderately stable, it is not as stable as some hardwoods and less unstable than others.

    Another factor that contributes to the degree of seasonal movement is the treatment of the timber. Kiln-drying and treating pine results in a more stable product than air-drying and treating the same species. Builders should take steps to limit movement of framing timbers; however, such efforts are not expected to totally eliminate movement.

    Using good building practices will limit how much the framing timbers move, but they cannot completely stop movement from occurring. The first step toward limiting movement is to use well-dried lumber as the foundation for your structure. Lumber that has been brought into the frame at 15% moisture content will have less movement than lumber of the same species and similar dimensions that had 20% moisture content when it went into the frame. This is due to the fact that the 20% moisture content lumber sat in the rain for two weeks while it was on the job site.

    In addition to bringing in well-dried lumber, builders should store lumber in a way that will protect the lumber from water before the lumber is installed. Builders who store lumber on the job site in such a manner that the lumber is protected from the elements, will experience less movement from the lumber than those builders who do not take the same precautions. Many builders fail to protect their lumber from the elements while on the job site. For example, on large job sites, many times the material delivery is so chaotic, builders will allow their lumber to get wet.

    The other factor that affects the amount of movement in the lumber is the sequence of the finishing work. Plasterboard installed over the framed wall after all of the framing is complete, captures most of the movement potential in the wall. In ideal conditions, it is best to allow the frame to dry out for a number of weeks (in a closed-in area with ventilation), prior to the plasterboard being installed. This allows the frame to go through part of the drying process before the finishes are installed. As a result, the number of cracks that will develop in the future is minimized.

    Even though there are steps that can be taken to minimize movement in the lumber, there is always going to be some movement that occurs. Whether the lumber is well-dried, stored in a protective manner and allowed to dry for an extended period of time before it is installed, the lumber will still respond to the changes in the indoor environment that occur from the occupancy of the dwelling. The purpose of prudent building practices is to minimize movement.

  • The Complete Guide to House Clearance: What to Expect and How to Prepare

    The Complete Guide to House Clearance: What to Expect and How to Prepare

    House clearance can feel overwhelming, whether you’re dealing with a bereavement, helping elderly parents downsize, or tackling a property that’s been left to accumulate years of belongings. The sheer volume of items, the emotional weight of decisions, and the logistics of disposal can leave even the most organized person feeling lost. But here’s the thing – with the right approach and understanding of the process, house clearance becomes much more manageable.

    Understanding What House Clearance Actually Involves

    House clearance goes far beyond just removing furniture and throwing things away. It’s a systematic process of sorting, evaluating, and disposing of an entire household’s worth of belongings. This includes everything from obvious items like furniture and appliances to the forgotten contents of drawers, cupboards, and storage spaces that families often overlook.

    The process typically involves several distinct phases. First comes the initial assessment, where the scope of work gets determined. Then there’s the sorting phase, separating items that can be donated, sold, recycled, or need special disposal. Finally, there’s the actual removal and cleaning, leaving the property ready for its next chapter.

    Most people underestimate the emotional toll this can take. Going through someone else’s belongings, or even your own accumulated possessions, brings up memories and requires countless decisions about what stays and what goes.

    When Professional Help Makes Sense

    While some house clearances can be handled as DIY projects, many situations call for professional assistance. Bereaved families often find the task too emotionally challenging to tackle alone. Properties with hoarding situations require specialized knowledge and sensitivity. Sometimes the timeline is simply too tight – perhaps a property sale is pending or rental agreements have specific deadlines.

    Professional house clearance services bring experience, equipment, and efficiency that can transform what feels like an impossible task into a manageable process. They understand the regulations around different types of waste disposal, have established relationships with recycling centers and charities, and can handle heavy lifting that might be dangerous for family members to attempt.

    The problem is, not all clearance services operate the same way. Some focus purely on removal without consideration for salvaging valuable items, while others take time to identify things worth selling or donating.

    Preparing for a House Clearance

    Preparation makes an enormous difference in how smoothly the clearance process goes. Start by securing the property – ensure all utilities are still connected if the clearance team will need them, and make sure there’s adequate access for vehicles and equipment.

    Document anything of obvious value before the clearance begins. Take photos of antiques, jewelry, or family heirlooms. Check with family members about items they might want to keep – this conversation is much easier before the clearance starts than during.

    Create a rough inventory of rooms and their contents. You don’t need to catalog every item, but understanding whether you’re dealing with a minimally furnished flat or a house packed with decades of accumulation helps everyone set realistic expectations.

    Consider what documents might be important. Bank statements, insurance policies, wills, and property deeds often turn up during clearances. Having a system for handling these documents prevents important papers from accidentally being discarded.

    The Clearance Process Step by Step

    Most professional clearances start with a walkthrough where the team assesses the scope of work. They’ll identify any items requiring special handling – hazardous materials, electronics that need specific disposal methods, or extremely heavy items requiring additional equipment.

    The sorting phase is where experience really shows. Professional teams can quickly identify items worth selling, things suitable for donation, materials that can be recycled, and genuine waste. They understand which charities accept different types of donations and can often arrange collections directly.

    Heavy items typically get removed first – furniture, appliances, and large objects that take up the most space. This creates working room for sorting through smaller items. Delicate or valuable items get special handling to prevent damage during the process.

    The cleaning phase often reveals items that were hidden or forgotten. Professional teams do a final sweep to ensure nothing important gets overlooked, then leave the property in a clean, empty state.

    Managing Costs and Avoiding Surprises

    House clearance costs vary dramatically based on several factors. Property size is obvious, but the volume and type of contents matter more than room count. A three-bedroom house packed to the ceiling costs more to clear than a five-bedroom property with minimal furnishing.

    Access challenges increase costs. Properties with narrow staircases, no parking for vehicles, or difficult lifting requirements take more time and potentially additional equipment. Some items incur disposal charges – mattresses, electrical appliances, and certain types of furniture have specific disposal requirements.

    Here’s where it gets expensive: last-minute rushes. Emergency clearances cost significantly more than planned ones. Weekends and holidays carry premium rates. Properties requiring multiple visits because of access issues or additional discoveries add up quickly.

    The good news is that valuable items can offset costs. Antiques, quality furniture, jewelry, or collectibles might be sold with proceeds reducing the overall clearance bill. Some companies operate on this model specifically, taking time to identify valuable items rather than treating everything as waste.

    Special Considerations for Different Situations

    Bereavement clearances require extra sensitivity and often more time. Family members need space to process emotions and make decisions about sentimental items. Professional teams experienced in these situations understand the emotional weight and can provide appropriate support.

    Hoarding situations need specialized approaches. Safety is paramount – structural damage, pest issues, or hazardous materials are common concerns. These clearances often require coordination with other professionals like cleaners, pest control, or even structural engineers.

    Rental properties have specific requirements. Landlords need properties returned to original condition, which might mean removing items previous tenants left behind and addressing any damage. Timeline pressures are often intense with new tenants waiting to move in.

    What Happens to Cleared Items

    Understanding where cleared items go helps set realistic expectations and can influence cost. Quality furniture often goes to furniture charities or second-hand stores. Electrical items need specialist recycling to comply with environmental regulations. Clothing and household goods might go to various charity shops.

    Genuine waste goes to licensed waste disposal facilities. Professional clearance companies should provide waste transfer notes proving legal disposal – this protects property owners from potential legal issues if waste gets dumped illegally.

    Some items require special handling. Paint, chemicals, batteries, and certain electronic items have specific disposal requirements. Medical equipment, mobility aids, or hospital beds often have dedicated charities that can reuse them.

    Making the Right Choice

    The key to successful house clearance lies in matching the service to the specific situation. Straightforward clearances of standard household goods might suit companies focused on quick, efficient removal. Complex situations involving valuable items or sensitive circumstances need teams with appropriate experience and approach.

    Get multiple quotes, but compare more than just price. Ask about insurance, waste disposal methods, and what happens to items with potential value. Check reviews and references, particularly for situations similar to your own.

    Understanding the house clearance process reduces stress and helps set realistic expectations. Whether handling the clearance personally or working with professionals, knowing what to expect makes an emotionally challenging situation much more manageable. The goal is transforming what feels overwhelming into a systematic, achievable process that respects both practical needs and emotional concerns.

  • Creative Craft Ideas for Rainy Days: Engaging Activities to Spark Your Imagination

    Creative Craft Ideas for Rainy Days: Engaging Activities to Spark Your Imagination

    Rainy days can sometimes feel dull, but they also offer the perfect opportunity to engage in creative crafts. Using simple materials found at home, anyone can explore a variety of craft ideas that spark imagination and keep boredom at bay. From painting and drawing to sewing and building, these activities not only entertain but also nurture creativity.

    Crafting can be a fun way for individuals of all ages to express themselves. They can create handmade gifts, decorations, or even personal artwork that can brighten up any space. Each project not only serves as a distraction from dreary weather but also encourages skill development and imagination.

    This blog post highlights several engaging craft ideas that can be easily accomplished indoors. Whether it’s transforming recycled materials into new treasures or experimenting with different art supplies, these activities are sure to bring joy on a rainy day.

    Essential Supplies for Rainy Day Crafts

    Crafting can be a fulfilling way to spend time indoors, especially on rainy days. Having the right supplies readily available ensures a smooth and enjoyable crafting experience.

    Core Craft Materials

    A well-stocked craft supply collection includes the essentials that inspire creativity. Important materials include:

    • Construction Paper: Available in various colors, it serves as a versatile base for many projects.
    • Markers: Ideal for coloring and adding details, they can be used on paper and other surfaces.
    • Cardboard: Useful for building structures or creating three-dimensional art.
    • Pipe Cleaners: These flexible materials are perfect for making shapes and designs.

    These items lay the groundwork for countless creative endeavors, allowing for a variety of crafts to be completed with ease.

    Choosing Safe Tools for Children

    Safety is paramount when selecting tools for crafting, especially for children. It is crucial to choose age-appropriate tools to minimize risks.

    • Scissors: Opt for child-safe scissors that have rounded tips. They are effective yet reduce the chance of accidental cuts.
    • Glue: Use non-toxic glue for projects. Stick or PVA glue is generally safer and easier to manage compared to hot glue.
    • Paint: If painting is involved, look for washable and non-toxic options to simplify clean-up.

    Providing the right tools promotes a fun and safe crafting environment for young creators.

    Organizing and Storing Craft Supplies

    Efficient organization of craft supplies can enhance the crafting experience. Spaces should be designated specifically for various items.

    • Storage Bins: Clear bins allow for easy visibility and access to materials.
    • Labels: Proper labeling of storage areas helps children quickly find what they need.
    • Caddies: Crafting caddies is convenient for transporting supplies to different areas of the home.

    An organized setup not only saves time but also encourages kids to explore their creativity independently.

    Paper-Based Creative Projects

    This section explores various engaging projects that utilize paper and cardboard. From simple crafts that anyone can try to more advanced creations, there are options available for all skill levels.

    Simple Paper Crafts for Beginners

    For those new to crafting, simple paper projects are an excellent way to start. Items such as paper airplanes, origami figures, and greeting cards require minimal supplies.

    Materials needed:

    • Colored paper
    • Scissors
    • Glue
    • Markers or crayons

    Instructions:

    • Paper Airplanes: Fold a sheet of paper in half lengthwise, unfold, and create wing folds.
    • Origami: Follow step-by-step guides online to create animals or objects.
    • Greeting Cards: Fold a piece of cardstock and decorate it with drawings or messages.

    These projects encourage creativity and are perfect for all ages.

    Advanced Projects Using Cardboard

    For those looking to challenge their skills, projects using cardboard can be rewarding. Building items like cardboard models, dioramas, or 3D sculptures allows for intricate designs.

    Materials needed:

    • Cardboard boxes
    • Craft knife
    • Ruler and pencil
    • Paint or decorative paper

    Ideas:

    • Dioramas: Create scenes using a shoebox, integrating figures made from paper.
    • Sculptures: Cut and layer cardboard to design abstract forms or figures.

    These projects foster problem-solving skills and provide a fun way to spend time indoors.

    Printable Coloring Pages

    Printable coloring pages are a low-effort, high-reward activity that encourages artistic expression. Many websites offer a vast array of designs, from simple patterns to intricate illustrations.

    How to Access:

    • Search for coloring pages based on themes—animals, mandalas, or nature.
    • Download and print the chosen designs.

    Recommended Supplies:

    • Markers
    • Colored pencils
    • Watercolors for added flair

    Coloring can be therapeutic, making it a perfect rainy day activity for all ages.

    Personalized Art Projects

    Creating personalized art projects can add meaning to a simple craft. This includes custom notebooks, photo frames, or scrapbook pages.

    Materials needed:

    • Blank notebooks or cardstock
    • Photos or magazine cutouts
    • Decorative elements like washi tape or stickers

    Steps:

    • Custom Notebooks: Decorate the cover with drawings or positive quotes.
    • Photo Frames: Use cardstock to craft a frame that showcases favorite images.

    These projects allow for personal expression and are great for keeping memories alive.

    Interactive Indoor Activities for Kids

    Rainy days can provide an excellent opportunity for children to engage in various interactive indoor activities. These activities can foster creativity while keeping kids entertained and stimulated.

    Rainy Day Activities for Groups

    Group activities enhance social skills and encourage teamwork among children. One engaging idea is a scavenger hunt. Parents can create a list of items for kids to find around the house.

    Other group activities include:

    • Board Games: Classics like Monopoly or Scrabble can keep children engaged for hours.
    • Indoor Campsite: Set up a tent in the living room. Kids can read stories or play games inside.
    • Craft Stations: Set up different tables with various supplies such as paper, glue, and paint. Kids can rotate stations, creating different projects.

    These activities not only entertain but also promote collaboration and communication.

    Solo Craft Ideas for Children

    Individual craft projects allow children to express their creativity at their own pace. Painting is an excellent solo activity. Kids can use watercolor, acrylics, or even finger paints to create their masterpieces.

    Another option is DIY jewelry. Children can use beads, string, and other materials to craft bracelets or necklaces. This activity aids fine motor skills while being enjoyable.

    Other notable solo activities include:

    • Origami: Simple instructions can lead to the creation of stunning paper art.
    • Journaling: Encourage children to write stories or draw in personalized notebooks.

    These solo activities help children develop independence and focus.

    Sensory Crafts and Learning

    Sensory crafts provide tactile experiences that can be beneficial for kids’ development. Using materials such as playdough or slime can engage their senses in a fun way.

    Ideas for sensory crafts:

    • Textured Collages: Gather various materials like fabric, sandpaper, and cotton balls. Children can create textured art pieces.
    • Water Beads: These provide visual and tactile stimulation. Kids can explore colors and shapes while playing with them.
    • Nature Sensory Bins: Fill bins with items like leaves, pebbles, and flowers. Kids can explore and learn about nature indoors.

    Sensory activities enhance learning and creativity, making them perfect for rainy days.

  • The Hidden Systems That Keep Your Home Running (And What Happens When They Don’t)

    The Hidden Systems That Keep Your Home Running (And What Happens When They Don’t)

    You know that feeling when you flip a light switch and nothing happens? Or when you turn on the tap and only a sad trickle comes out? That moment of confusion where your brain takes a second to catch up with what’s actually going wrong? Welcome to the world of hidden home systems – the stuff that works so well most of the time that we completely forget it exists.

    Most people think about their house in terms of rooms, walls, and maybe the roof. But underneath all that visible stuff runs a network of systems that would make a spacecraft jealous. These systems handle everything from the water you drink to the air you breathe, and they do it so quietly that you never really think about them until something goes sideways.

    The Invisible Network Under Your Feet

    Take your water system, for example. Every time you shower, wash dishes, or water the garden, there’s a whole chain of equipment working together to make that happen. The water doesn’t just magically appear at your taps – it gets pushed through pipes by pumps, filtered through various systems, and heated by your hot water unit.

    Your water pump sits somewhere doing its job day after day, year after year, moving thousands of gallons without you ever seeing it. Most homeowners have no idea where their pump even is, let alone what condition it’s in. But when that pump decides to call it quits, suddenly everyone becomes very interested in how the water system works.

    The same thing happens with your electrical system. Miles of wiring snake through your walls, connecting everything from your refrigerator to your phone charger. Circuit breakers sit in their little box, ready to flip if something goes wrong. Most people only think about their electrical system when the power goes out or when they need to reset a breaker.

    When Good Systems Go Bad

    Here’s where things get interesting – and expensive. These hidden systems don’t usually fail gradually. They work perfectly fine until one day they just don’t. Your hot water system might give you years of reliable service, then suddenly you’re taking cold showers because the heating element decided to retire without notice.

    Water pumps are particularly sneaky about this. They’ll pump water happily for years, then one morning you’ll wake up to no water pressure because something inside finally wore out. When pump problems hit, they don’t just affect one tap – they can shut down your entire water supply. If you’re dealing with pump issues, getting professional help quickly makes a huge difference. For Melbourne residents facing these problems, services specializing in Water Pump Repair in Melbourne can restore your water supply and prevent more serious damage to your system.

    The heating and cooling system follows the same pattern. Your air conditioner works great all summer until that one really hot day when it decides to break down. Of course it picks the worst possible time – that’s just how these things work.

    The Domino Effect Nobody Talks About

    What makes hidden system failures even worse is how they affect everything else. When your water pump fails, you don’t just lose water at the taps. Your hot water system might get damaged from running dry. Your garden dies. You can’t do laundry. Simple tasks become major headaches.

    Electrical problems create their own cascade of issues. A faulty circuit might not just kill the lights – it could damage expensive appliances plugged into that circuit. A failing electrical panel might cause voltage fluctuations that slowly damage electronics throughout your house.

    The plumbing system connects to almost everything else too. A water leak doesn’t just waste water – it can damage floors, walls, and furniture. It can create mold problems that affect air quality. A small leak that goes unnoticed can cause thousands of dollars in damage before anyone realizes what’s happening.

    The Real Cost of Ignoring the Signs

    Most hidden systems give you warning signs before they completely fail, but these signs are easy to miss if you don’t know what to look for. That slight change in water pressure might mean your pump is struggling. Those flickering lights could signal electrical problems brewing. The furnace that takes a little longer to warm up might be developing serious issues.

    People often ignore these early warning signs because the system still works – just not quite as well as before. But catching problems early almost always costs less than waiting for a complete breakdown. A pump that’s making unusual noises might just need a simple repair, but if you wait until it stops working entirely, you might need a whole new system.

    The same logic applies to every hidden system in your house. Regular maintenance and quick attention to small problems prevent most of the big, expensive disasters that leave homeowners scrambling for emergency repairs.

    Taking Care of What You Can’t See

    The key to avoiding hidden system disasters is remembering that these systems exist and need attention. Set up regular maintenance schedules for your major systems. Have professionals check your electrical panel, service your heating and cooling equipment, and inspect your water systems periodically.

    Learn to recognize the early warning signs of trouble. Strange noises, changes in performance, and unusual smells all deserve investigation. Don’t wait until something stops working completely to call for help.

    Keep records of when systems were installed and serviced. Knowing the age and maintenance history of your equipment helps you plan for replacements before emergencies strike.

    Your hidden systems work hard to keep your home comfortable and functional. Giving them a little attention before problems develop saves money, prevents headaches, and keeps everything running smoothly. After all, the best time to think about these systems is when they’re still working perfectly.

  • Why Comfort at Home Is More Than Just Cozy Furniture

    Why Comfort at Home Is More Than Just Cozy Furniture

    When people think about making their homes comfortable, they often imagine soft couches, warm blankets, or stylish decorations. These things are nice, of course, but comfort goes much deeper than what can be seen. Real comfort comes from the hidden systems that keep everything running smoothly—the plumbing that provides hot water, the heating that keeps winter nights bearable, and the airflow that makes a room feel fresh. Without these essentials, a home wouldn’t feel cozy at all, no matter how many pillows or candles were added.

    The Hidden Side of Comfort

    Every home has systems working silently behind the walls and under the floors. They don’t get much attention because they’re usually out of sight, but when something breaks, everyone notices. A pipe leak can turn a quiet evening into a stressful clean-up session. A broken water heater can leave someone shivering in a cold shower. Even something as simple as a slow-draining sink can throw off the rhythm of a day.

    It’s easy to take these systems for granted. After all, most people expect water to come out of the tap, toilets to flush, and heaters to switch on with the press of a button. But when they don’t, the importance of maintenance and quick repairs becomes crystal clear. This is why it’s a smart idea for homeowners to learn more about reliable plumbing services before small problems turn into big ones.

    Why Plumbing Matters More Than People Think

    Plumbing is often thought of as nothing more than pipes carrying water in and out, but it’s far more important than that. Clean running water is what makes cooking, cleaning, and bathing possible. It’s what keeps a kitchen functional and a bathroom sanitary. Good plumbing doesn’t just make life easier—it makes life healthier.

    Consider the difference between a home with strong water pressure and one where the shower barely trickles. In the first, showers are refreshing and quick. In the second, they drag on and feel frustrating. Or think about a toilet that works properly compared to one that constantly clogs. It’s not just about convenience; it’s about reducing stress and keeping daily routines simple.

    The Role of Heating in Everyday Life

    In places where winters are cold, heating is more than just comfort—it’s survival. Imagine coming inside after walking through icy wind only to find that the house is as chilly as the outdoors. A warm home creates a safe space where families can relax, sleep well, and stay healthy during freezing months.

    Heating systems also protect the home itself. Without steady warmth, pipes can freeze and burst, causing expensive damage. This shows how heating and plumbing often work hand in hand. A furnace may keep rooms warm, but it’s also helping to prevent water from turning to ice inside the pipes.

    Small Issues That Grow Bigger

    One of the tricky things about home comfort is that small problems rarely stay small. A dripping faucet might seem harmless, but over time, it wastes gallons of water and raises utility bills. A little leak under the sink can slowly damage cabinets, floors, or walls until the repair costs skyrocket. Even strange noises from pipes or radiators can signal a bigger issue that needs attention before it gets worse.

    The best way to avoid these headaches is to pay attention early. When something seems off—whether it’s water pressure, slow drains, or unusual sounds—it’s worth looking into. Quick fixes keep homes running smoothly and prevent bigger disruptions later.

    Comfort Isn’t Just Physical

    While plumbing and heating keep people physically comfortable, they also make a big difference in emotional comfort. A home should feel safe and stress-free. When there are constant problems—like cold showers, bad smells from drains, or a heater that struggles to warm the space—it creates frustration. Over time, that stress can affect how people feel about their homes.

    On the other hand, when everything works as it should, people don’t even think about it. They can enjoy cooking a meal, taking a warm shower, or relaxing in a cozy room without worrying about what’s happening behind the walls. That peace of mind is what makes a house feel like home.

    The Real Meaning of Home Comfort

    Cozy furniture, decorations, and personal touches all matter, but they’re only the surface of comfort. The real foundation comes from the systems that people rarely see. Plumbing delivers clean water and removes waste. Heating keeps families safe and warm in the cold. Both work together quietly, making daily life simple and enjoyable.

    It’s easy to underestimate how important these hidden parts of a home are, but they’re what truly make a space livable. Anyone can buy a new couch or hang up art, but without hot water, working drains, or reliable heat, that space wouldn’t feel welcoming.

    Takeaway

    Home comfort is more than blankets and furniture. It’s about reliable systems that support everyday life. Plumbing, heating, and other behind-the-scenes helpers are what truly create a safe, stress-free environment. Paying attention to small problems, getting repairs done quickly, and making sure these systems are well-maintained is the best way to keep a home running smoothly.

    When everything works the way it should, people can enjoy their cozy spaces without worry. And that’s what real comfort is all about.

  • DIY Outdoor Projects to Upgrade Your Backyard: Transform Your Space with Simple Changes

    DIY Outdoor Projects to Upgrade Your Backyard: Transform Your Space with Simple Changes

    Transforming a backyard into an inviting outdoor space can significantly enhance its functionality and aesthetic appeal. DIY outdoor projects not only offer a chance to personalize a home but can also be a rewarding way to improve an existing area without requiring a hefty budget. From building a fire pit to creating a garden bed, there are countless projects that cater to various skill levels and preferences.

    Many homeowners are discovering the benefit of taking on these home improvement projects themselves. Engaging in DIY tasks fosters creativity and can lead to a greater sense of accomplishment once completed. Simple renovations, such as adding lighting or constructing seating areas, can immediately uplift the overall ambiance of the backyard.

    By investing time and effort into these upgrades, individuals can enjoy a personalized outdoor oasis that reflects their tastes and lifestyle. Whether it’s enhancing the space for entertaining guests or creating a tranquil retreat, each project offers an opportunity to connect more with the outdoor environment.

    Essential DIY Landscaping Upgrades

    Upgrading landscaping can significantly enhance outdoor spaces. Focusing on pathways, mulching, and raised garden beds provides essential elements for a visually appealing and functional backyard.

    Creating Budget-Friendly Pathways

    Pathways can transform backyard landscaping by providing structure and accessibility. They can be made using materials like gravel, bricks, or recycled wood.

    Consider these steps for a simple DIY path:

    • Plan the layout: Use a garden hose or string to outline the path’s shape.
    • Prepare the area: Remove grass and weeds from the defined space.
    • Add a base layer: Consider using landscaping fabric to prevent weeds, then fill with gravel for drainage.
    • Finish with stones or pavers: Place stones or bricks for a durable, appealing finish.

    This approach is both cost-effective and easy to customize, depending on personal style.

    Mulching and Ground Cover Solutions

    Mulching can improve aesthetics and reduce weed growth. It also helps retain moisture in the soil for plants.

    Options for mulch include:

    • Organic Mulch: Bark, wood chips, or straw break down to enrich the soil.
    • Inorganic Mulch: Gravel or rubber mulch provides a permanent solution.

    Ground covers can complement mulch by filling in bare spots. They include options like:

    • Creeping thyme: Drought-resistant and fragrant.
    • L’ilac or clover: Soft underfoot; adds greenery.

    Choosing the right combination can result in a beautiful, low-maintenance garden bed.

    Building Raised Garden Beds

    Raised garden beds are ideal for growing vegetables and flowers with better drainage and soil quality. They also minimize strain on the back during gardening tasks.

    To create raised beds:

    • Select materials: Use rot-resistant wood or recycled materials for sustainability.
    • Determine dimensions: A common size is 4 feet wide by 6 to 8 feet long with a height of 12 to 24 inches.
    • Build the frame: Assemble the sides and secure corners with screws or brackets.
    • Fill with a soil mix: Combine topsoil, compost, and peat moss for optimal growth.

    These beds enhance productivity and can be designed to fit any outdoor space, adding a distinct touch to the backyard landscape.

    Transformative Outdoor Living Projects

    Upgrading a backyard can significantly enhance the outdoor living experience. Key projects include installing a DIY fire pit, setting up a cozy dining patio, and building an outdoor bar. Each project adds functionality and style to the outdoor space.

    DIY Fire Pit Installation

    A DIY fire pit can become the focal point of any backyard. It offers warmth and ambiance, perfect for gatherings or quiet evenings.

    Materials Needed:

    • Fire pit ring or blocks
    • Gravel
    • Pavers or stones for the base
    • Fire-resistant material

    Start by choosing a safe location, away from overhanging branches and structures. Excavate the area, laying down gravel for drainage. Arrange the fire pit ring and surround it with stones for stability.

    Ensure proper ventilation and safety by following local regulations regarding fire pits. Complete the installation with seating arrangements around the fire pit to create a welcoming atmosphere.

    Setting Up a Backyard Dining Patio

    Creating a dining patio transforms a backyard into a functional entertainment space. This project involves defining a designated area for outdoor meals.

    Key Elements:

    • Durable dining table and chairs
    • Weather-resistant materials
    • Optional shade structures (e.g., pergolas or umbrellas)

    Begin by selecting a flat area, then clear the space of debris. Use pavers, deck tiles, or gravel to create a solid foundation.

    Arrange your table and chairs thoughtfully to promote interaction. Consider incorporating ambient lighting, such as string lights or lanterns, to enhance the experience during evenings.

    To provide additional shade and comfort, you can also consider installing awnings, which not only protect diners from sun and light rain but also add a stylish element to your backyard dining space. For the best results, opt for professional awnings in Edmonton or similar services elsewhere. This not only extends the usability of your patio throughout the day but also increases the overall value and aesthetic appeal of your outdoor space.

    Beyond shade and awnings, the health and design of the lawn beneath your patio greatly influence long-term usability and curb appeal. In humid climates it’s especially important to choose the right turf and plan grading and irrigation so water doesn’t pool under overhead structures.

    Local experts like Sunrise Sod Services can advise on Florida-friendly sod varieties, proper irrigation placement, and discreet yard drainage solutions that protect patios and extend outdoor seasons. Tackling these details early saves time and keeps entertaining areas comfortable and low-maintenance.

    Building an Outdoor Bar

    An outdoor bar can elevate backyard gatherings and parties. This feature provides a dedicated space for refreshments and socializing.

    Essential Components:

    • Countertop (wood, stone, or concrete)
    • Base structure (wood frame or prefabricated shed)
    • Bar stools

    Select a convenient location near the dining area or fire pit. Construct the frame using weather-resistant wood, ensuring stability. Attach the countertop securely for durability.

    Stock the bar with outdoor essentials such as drinks, glassware, and tools. Adding features like a built-in cooler or sink can enhance functionality.

    An outdoor bar not only serves beverages but also creates an entertaining atmosphere for friends and family.

    An outdoor bar can certainly enhance comfort, but it may also create shaded areas that attract insects—particularly bees—around sweet drinks and seating. If you notice persistent bee activity near the bar area, addressing nests or swarms promptly helps keep guests safe and patios usable. Local specialists like the Valleywide Bee Removal team can evaluate the situation and remove bees responsibly.

    Creative Gardening and Greenery Ideas

    Innovative gardening projects can transform a backyard space and add vibrant greenery. Implementing vertical gardens, container gardens, and colorful window boxes is are effective way to enhance landscape aesthetics while maximizing space.

    Designing a Vertical Garden

    Vertical gardens, also known as living walls, utilize vertical space for planting. They can be constructed using a variety of materials such as wood pallets, metal grids, or specialized systems designed for vertical planting.

    To create a successful vertical garden, select plants that thrive in your climate. Consider using a mix of herbs, succulents, or flowering plants. Drip irrigation systems can efficiently water these gardens by delivering moisture directly to the roots, minimizing water waste. Regular maintenance includes pruning and monitoring for pests.

    Container Garden Tips

    Container gardening is an excellent choice for those with limited space or poor soil conditions. It allows for a variety of plants, including vegetables, herbs, and ornamental flowers.

    When choosing containers, opt for materials like clay, plastic, or wood, ensuring they have proper drainage holes. Group containers together to create an appealing display. Regular watering and fertilization are key for plant health. Rich soil that retains moisture and provides nutrients is essential for growth.

    Colorful Window Boxes

    Window boxes can add charm and liveliness to any home exterior. They are perfect for small spaces and can complement existing architectural features.

    Select a mix of trailing, upright, and filler plants for visual interest. Some popular choices include petunias, geraniums, and ivy. Ensure window boxes have drainage to prevent waterlogging. Regularly deadhead flowers to encourage blooming and maintain a tidy appearance.

    Incorporating these gardening types can significantly upgrade any backyard, creating a lush and inviting environment.

    Finishing Touches and Easy Upkeep

    In enhancing a backyard space, the right finishing touches and maintenance strategies are crucial. Effective outdoor lighting, privacy solutions, painting techniques, and regular upkeep can elevate the overall aesthetic while ensuring longevity.

    Outdoor Lighting Solutions

    Proper outdoor lighting enhances safety and ambiance. Options include:

    • String lights for a cozy feel.
    • Solar garden lights for energy efficiency.
    • Motion sensor lights for security.

    Placing lights along walkways and around seating areas improves visibility while creating an inviting atmosphere. For a DIY approach, use warm white LED bulbs and weather-resistant fixtures to withstand outdoor conditions. Solar-powered options require no wiring, making them an accessible choice for various budgets. Adding more outdoor lighting or modern fixtures may involve upgrading a fuse board to safely handle the increased electrical demand, ensuring the system remains reliable and reducing the risk of overloads. Certified electricians should be consulted for such upgrades to maintain safety and compliance with regulations.

    DIY Privacy Screens

    Creating privacy can dramatically improve a backyard space. Effective options include:

    • Trellises adorned with climbing plants for a natural look.
    • Reclaimed wood panels for a rustic feel.
    • Fabric screens that are easily removable.

    These solutions cater to diverse styles while providing shelter from neighbors. The choice of materials can be customized to fit the overall design. Tall plants or fences can also contribute to a secluded environment effectively.

    Painting and Power Washing Tips

    A fresh coat of paint can revive faded fixtures and furniture. It’s essential to choose exterior-grade paint for durability. Ideal surfaces include:

    • Wooden decks
    • Garden furniture
    • Fences

    Before painting, thorough power washing removes dirt, mold, and mildew, ensuring optimal adhesion. It’s advisable to use a mild detergent on a low-pressure setting to avoid damaging surfaces. Scheduling this upkeep regularly can maintain appearance across seasons.

    Backyard Maintenance Essentials

    Routine maintenance is key to sustaining a beautiful backyard. Important tasks include:

    • Mowing and edging lawns for neatness.
    • Weeding gardens to prevent overgrowth.
    • Trimming shrubs and trees for health and shape.

    Establishing a seasonal checklist can streamline this process and promote consistent upkeep. Regular care not only enhances the visual appeal but also protects the investment in DIY upgrades.

  • Why Your Floors Look Older Than They Really Are

    Why Your Floors Look Older Than They Really Are

    Sometimes you look at your wood floors and wonder how they ended up looking so tired. They’re not scratched to pieces or totally damaged, but they still don’t shine like they used to. Even after sweeping and mopping, they seem dull. Maybe the edges near the walls look darker than the rest, or the entire floor feels like it’s lost some of its original colour.

    It’s frustrating, especially when you clean regularly and take care of your home. But here’s the thing—floors can look older than they really are, and it usually happens slowly. Most of the time, it’s not because they’re worn out. It’s because of what’s sitting on top of them.

    Everyday Buildup Makes a Big Difference

    Even if you vacuum or sweep often, wood floors pick up a lot more than you might think. Dirt, tiny bits of food, oils from skin, pet hair, and even cleaning products can build up on the surface. It’s not always obvious right away, but over time, it changes the way your floors look.

    That buildup can leave behind a dull finish. It sits on the wood and creates a thin layer that makes the floor look cloudy or faded. And no matter how much you mop, it doesn’t go away because it’s not just on the surface anymore—it’s settled into the grain of the wood or in the small grooves between floorboards.

    Some cleaners also make the problem worse. If you use the wrong product or don’t rinse it properly, it can leave a film. That film builds up and traps dirt, making your floors look like they’ve aged even if they’re still in good condition underneath.

    Scratches and Small Damage Catch Dirt Easily

    Even light scratches on your floors can collect dust and grime. The scratches aren’t always deep, but they act like little holding spots for dirt. After a while, these areas become darker than the rest of the floor, especially in places where people walk the most.

    The more scratches you have, the more uneven the floor will look. Instead of seeing a clean, smooth finish, you’ll notice dark streaks or patches that don’t match the rest of the room. It might seem like the floor is just worn out, but really, it’s mostly trapped debris.

    This is why regular sweeping isn’t enough on its own. Even with good habits, it’s almost impossible to keep those small grooves totally clean without deeper help once in a while.

    Mopping Helps—But Not As Much As You Think

    It’s easy to think that mopping should fix everything. You use warm water, maybe add a cleaner that smells nice, and the floor looks better for a few minutes. But a few hours later, it starts looking dull again. That’s not just disappointing—it’s a sign the dirt is deeper than your mop can reach.

    Some mops leave behind water that sits too long. That water can soak into the surface, especially if the finish is worn down. And if the mop head hasn’t been cleaned recently, it might actually be spreading dirt instead of removing it.

    That doesn’t mean you should stop mopping. It just means mopping alone doesn’t fix the problem if the floor is already coated in buildup or the finish has started to wear out.

    When a Deep Clean Makes the Real Difference

    There’s a big difference between everyday cleaning and professional floor care. The tools that professional cleaners use are designed to lift dirt out of the wood grain and remove old layers of product buildup. It’s not about scrubbing harder—it’s about using equipment that works below the surface.

    If your floors look older than they should, a wood floor cleaning service can often bring them back to how they used to look—without sanding, refinishing, or replacing anything. They don’t use harsh chemicals or anything that damages the wood. They simply clean it properly, which is something most home tools can’t do on their own.

    Sometimes, just one session makes a huge difference. The floor starts to look clearer, lighter, and more even in colour. That’s because the dirt, oils, and buildup that were sitting on the surface finally get removed completely.

    You Don’t Need to Wait for Obvious Damage

    A lot of people wait until their floors look really bad before getting help. But by that point, some of the damage might be harder to fix. Regular deep cleaning—once or twice a year—can keep the floor in better shape for longer.

    Even if your floors don’t look terrible yet, it’s worth paying attention to how they feel. If they’re sticky even after mopping, if the shine is completely gone, or if there’s a strange grey tint that won’t go away, it might be time to look into a professional clean.

    Keeping up with deep cleaning also helps protect your floor’s finish. The longer dirt sits, the more it wears down the surface. Once that protective layer is gone, the wood underneath gets exposed—and that’s when repairs become expensive.

    How to Keep Floors Looking Good Between Deep Cleans

    You don’t have to clean your floors constantly, but there are a few simple things that make a big difference.

    Try to vacuum or sweep a few times a week, especially in busy areas like the hallway or kitchen. This removes the dirt and dust that scratch the surface. Use a soft broom or a vacuum made for hard floors so you don’t cause more damage.

    Use the right mop—something that’s damp, not soaking wet—and a cleaner that’s made for wood. Avoid anything that leaves behind a residue or has wax in it unless your floor is meant for it.

    And don’t forget to clean under furniture or along baseboards. Dirt collects in those areas and slowly spreads out, especially if you have pets.

    These small habits help a lot, but they work best when paired with a proper cleaning every so often to reset your floors back to their best condition.

    What to Remember About Aging Floors

    Wood floors are strong and made to last, but they don’t stay looking new forever without some help. When they start to seem older than they should, it’s usually not because they’re ruined. It’s just that dirt, scratches, and old cleaning products have built up over time.

    The good news is that you don’t have to replace them. You probably don’t even need to sand or refinish them. Most of the time, a proper cleaning is all it takes to get them looking fresh again.

    If you’re doing your best to keep your home clean and your floors still feel dull, it’s okay to ask for help. A professional cleaning isn’t a big dramatic fix—it’s just a smarter way to handle something that regular tools can’t.


  • Why Bugs Love Your House (And How to Make Them Hate It)

    Why Bugs Love Your House (And How to Make Them Hate It)

    Ever wonder why bugs always seem to find a way into your house? You could be sitting on the couch, watching TV, and then—bam!—a spider drops from the ceiling or a line of ants marches through the kitchen like they own the place. It’s not just annoying. It’s also super gross. But here’s the thing: bugs don’t just show up for no reason. They’re after something. And once you figure out what that is, it’s way easier to stop them.

    Let’s break it down in a way that actually makes sense.


    Bugs Don’t Think Your House Is Gross (Even If It Is)

    Bugs aren’t judging your mess. They just want what they need to survive. And guess what? Most homes give it to them. Food, water, and shelter—that’s pretty much it. Ants want crumbs. Cockroaches love leftovers. Spiders want to snack on other bugs. And mice? They’ll chew through anything just to get a bite.

    Even if your house is super clean, bugs might still sneak in. Why? Because some things attract them without you even noticing. Damp areas, tiny cracks in the walls, dark hiding spots, and even the warmth inside your home during colder months all make your place bug-friendly.


    How They’re Getting In (And You Don’t Even Notice)

    Most bugs aren’t smashing through the front door. They’re slipping in through the tiniest cracks you’d never think about. Windows that don’t seal properly, holes in screens, gaps under doors, or even vents are wide open invites. Some bugs even ride in on bags, clothes, or pets.

    That’s why checking the outside of your house matters more than people think. If bugs can get in, they will. And once they’re inside, they’re not in a rush to leave.


    The Secret to Making Them Hate Your House

    Here’s the truth: the best way to stop bugs is to make your home as boring as possible—for them. That means taking away the things they want.

    Start with food. Don’t leave dishes out. Wipe counters after cooking. Sweep up crumbs, even the ones under the table that everyone forgets. Keep food sealed in containers instead of open boxes. Ants and cockroaches can sniff that stuff out in no time.

    Then there’s water. Bugs love damp areas. Fix any leaks fast, even small drips under the sink. If you’ve got a basement, use a dehumidifier to keep it dry. The less moisture, the better.

    Shelter is the last thing. That means getting rid of places bugs can hide. Don’t let clutter pile up. Cardboard boxes, stacks of paper, or unused corners in closets all make perfect bug hotels.

    If the problem’s already out of control, sometimes it helps to bring in experts. One smart option is checking out Sonic Barrier for devices that can help keep pests away without chemicals. It’s a cleaner way to handle things, especially for people who want something more natural.

    Some Bugs Are Worse Than Others

    Not all bugs are just creepy. Some can mess with your health or even damage your house. Termites eat wood from the inside out, and you might not notice until it’s too late. Bed bugs leave itchy bites and are super hard to get rid of. And cockroaches? They spread bacteria everywhere they walk.

    That’s why it’s not enough to just squish bugs when you see them. You have to stop them from wanting to be there in the first place. Because if they think your house is a free buffet or cozy hotel, they’ll tell their bug buddies—and then it’s a whole invasion.


    Pets and Pests: What You Might Not Know

    If you’ve got pets, bugs might see that as a bonus. Fleas and ticks love dogs and cats. Food bowls left out can attract ants or flies. And fur can even carry in bugs from outside without you knowing.

    It helps to clean up around pet areas and wash their bedding often. Also, regular vet checkups can make sure your furry friends aren’t bringing home unwanted guests.


    Nighttime: The Bug Party Time

    Bugs are mostly night creatures. They come out when it’s quiet, dark, and no one’s watching. That’s why you might not see them until you flip on the lights for a late-night snack and catch something scurrying across the floor.

    To fight back, try this: take out the trash every night, don’t leave food out, and turn off outdoor lights when you don’t need them. Some bugs, like moths and beetles, are drawn to lights. If you keep those lights off, they’re less likely to hang around your windows and doors.

    Keep an Eye Out for These Signs

    You don’t always have to see the actual bug to know they’re there. Look for signs like droppings (yeah, bug poop is a thing), tiny holes in food packaging, gnawed corners on boxes, or even weird smells. Some pests leave behind a musty, oily scent that’s pretty nasty.

    Also, listen. Scratching in the walls, squeaking, or little tapping sounds could mean mice or insects are crawling around. It’s weird to think about, but houses aren’t as quiet as people think—especially when pests move in.


    The Outside Matters Just As Much

    One thing people forget is that the outside of the house is just as important as the inside. Long grass, woodpiles, or trash near the house all attract bugs. And if they’re hanging out nearby, they’re only a few steps away from getting inside.

    Make sure grass is trimmed, bushes are cut back from the house, and trash cans are sealed tight. If you’ve got firewood, keep it stacked at least a few feet away from the walls. That way, bugs don’t get comfy right next to your home.


    What Actually Works (And What Doesn’t)

    There are tons of home remedies people swear by—peppermint oil, vinegar sprays, coffee grounds—but not all of them work for every pest. Some bugs don’t care about smells. Some get used to traps. And others, like roaches, are so tough they can live without a head for days.

    The most important thing is being consistent. Cleaning up once isn’t enough. It has to be a habit. Keeping things sealed, fixing leaks, and checking for gaps around doors and windows should be part of your regular routine.

    Sometimes it also takes more than one method. A mix of cleaning, sealing entry points, and using pest-control tools or devices works better than just one thing alone.


    Quick Recap: Make Bugs Regret Coming In

    Bugs don’t care if your home is pretty. They only want three things: food, water, and shelter. If you take those away, they’ll move on to somewhere else.

    So:

    • Keep things clean, especially the kitchen.
    • Fix leaks and dry out damp areas.
    • Seal up cracks and check screens and doors.
    • Watch for early signs—don’t wait until it’s a big problem.
    • Use smart solutions to keep pests away without harmful stuff.

    Turning your house into a place bugs don’t want to be doesn’t take fancy tools or a lot of money. It just takes knowing what they’re after—and being a step ahead.

    Got weird bug stories? Or tips that worked in your house? Share them with friends and keep the advice going. No one likes surprise bug guests, but with the right tricks, you don’t have to live with them